RIO Ready: Login/Self-Registration Functionality Setup
Login/Self-Registration Functionality Setup Guide.
Table of Contents
See also: RIO Ready: Login/Self-Registration Functionality
Prerequisite
- Install the RIO Ready - Login and Register (Pre-Deploy) and the RIO Ready - Login and Register from here.
- Ensure that the LoginAndRegister_preDeploy package is installed. If not sure, you can check in Salesforce if you have the following:
- REDU_Student_Permission_Group in the Permission Set Group (part of the Pre-Deploy package).
- REDU_Guest_Login_Permission in the Permission Set (part of the Login and Register package).
- If the above are not found, please contact WDCi for further assistance.
- If the login/registration modules are not in your instance and you have to install it, make sure that the User being utilized to install it must have a Role.
- For Self Registration, the Community must allow the user to Self Register, this setting can be found in:
All Sites -> *Site Name on the list* - Workspaces link -> Administration -> Login & Registration -> "Allow customers and partners to self-register".
- Also ensure that you have either installed the REDU - Student Profile here, or you have created your own custom student profile.
Login Page
- Login to Salesforce and go to “Setup”.
- From Setup, in the Quick Find box, enter Digital Experiences.
- Go to all All Sites and “RIO Education Community” and click on "Builder".
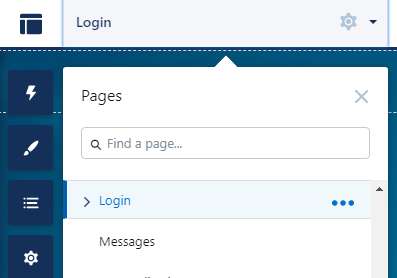
- From the top menu, search for 'Login'. Then, select the page.
- Replace the existing Login Form with REDU Login Form.
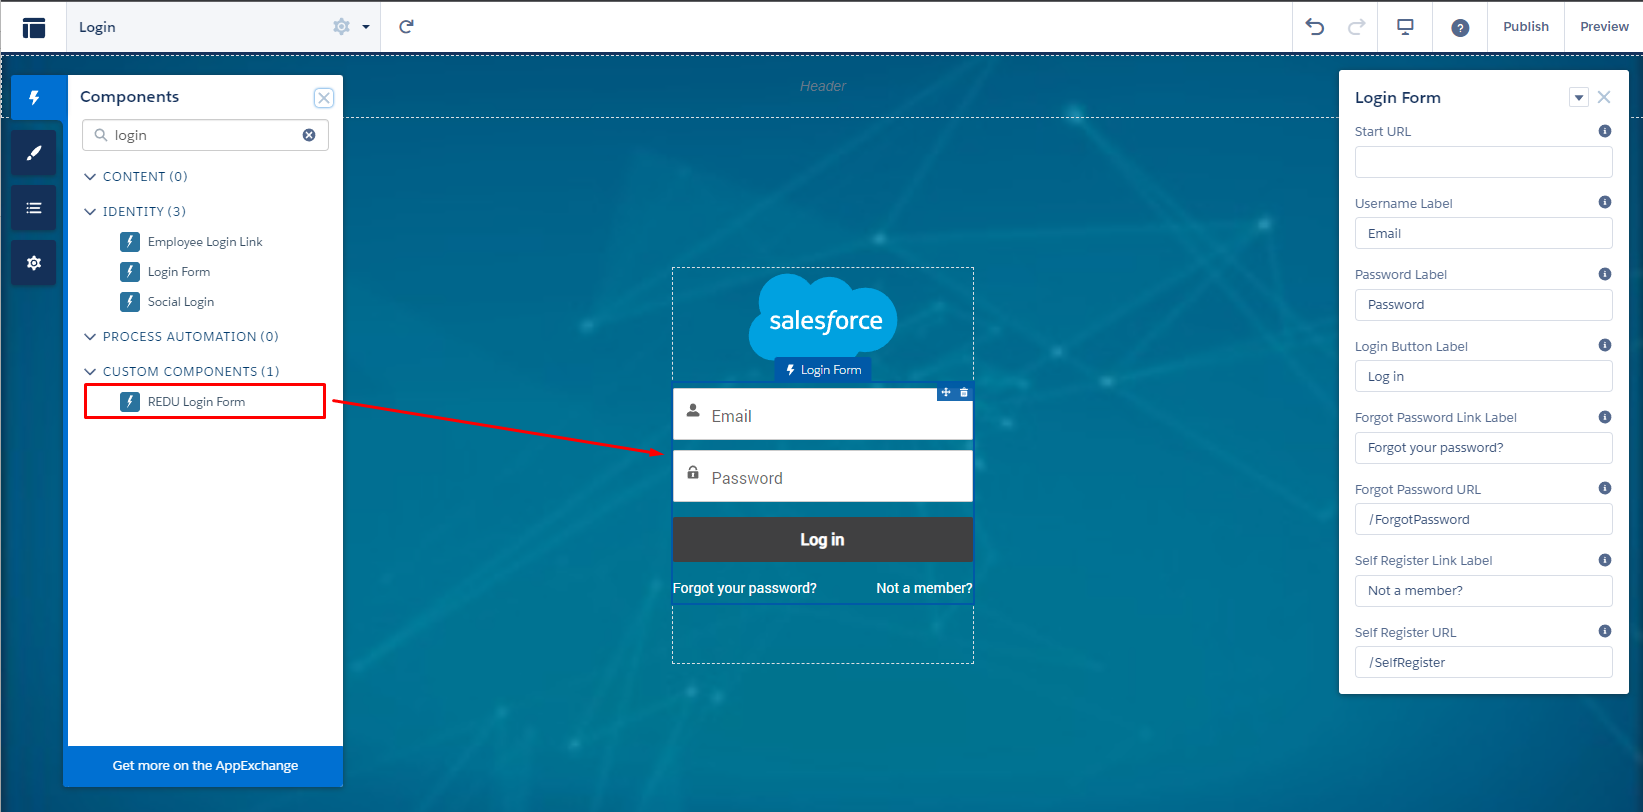
- On the component properties, the following URL will be already populated by default.
forgotPasswordUrl relative URL destination for the Forgot your Password link selfRegisterUrl relative URL destination for the Register Here link existingStudentUrl relative URL destination for the Existing Student link
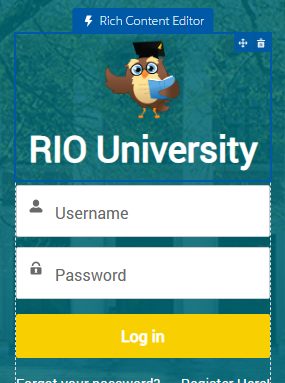
- You can replace the Salesforce logo with your own logo, using the 'Rich Content Editor' component.
- Publish the page when it's ready to have the changes done above committed.
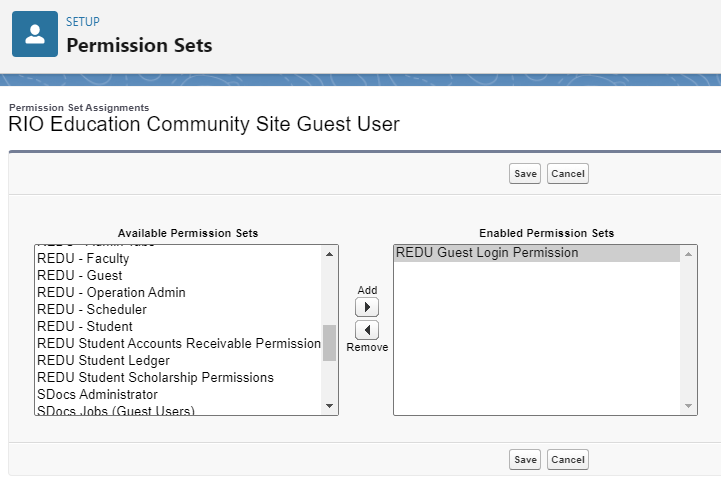
- Assign Permission Set called REDU Guest Login Permission to the Community Guest User.
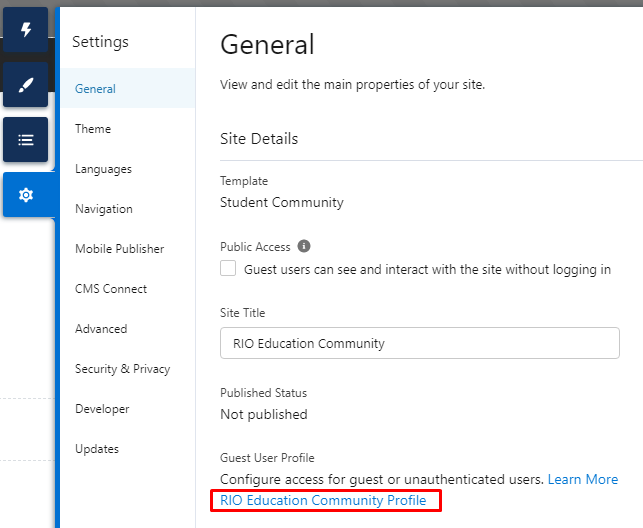
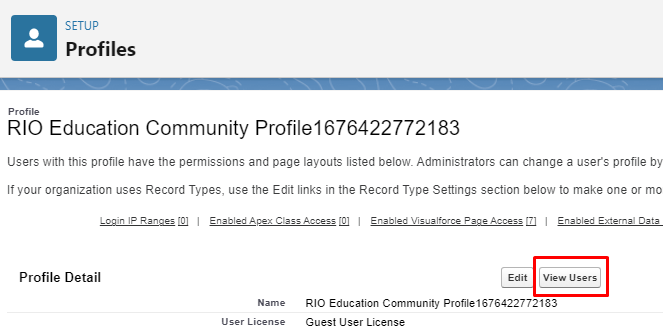
- In the Community Builder, navigate to Settings >> General, click on the guest user profile "RIO Education Community Profile".
- Click the button "View User" and select "Site Guest User, RIO Education Community".
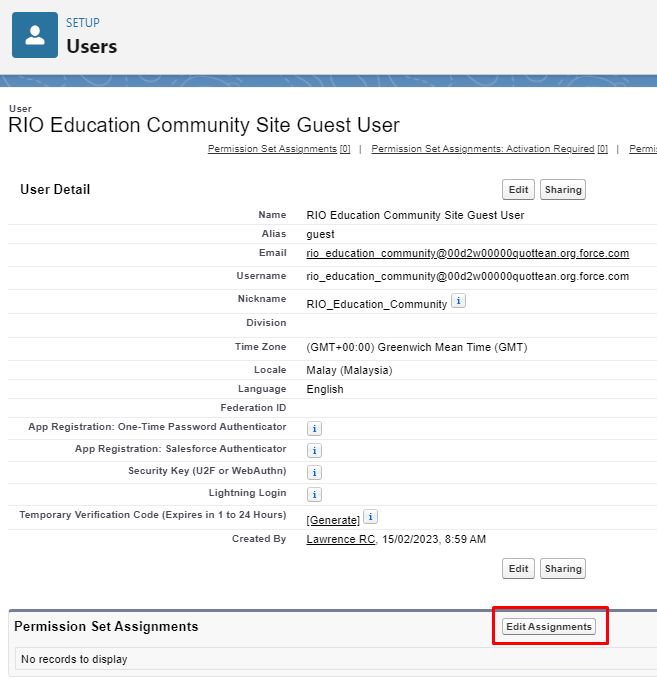
- Under the section "Permission Set Assignments", click Edit Assignment and assign permission set "REDU Guest Login Permission".
- In the Community Builder, navigate to Settings >> General, click on the guest user profile "RIO Education Community Profile".
- Click 'Save'.
- Then, navigate to Setup >> Custom Setting >> RIO Education Settings.
Update the Student - Permission Set Group with the value: REDU_Student_Permission_Group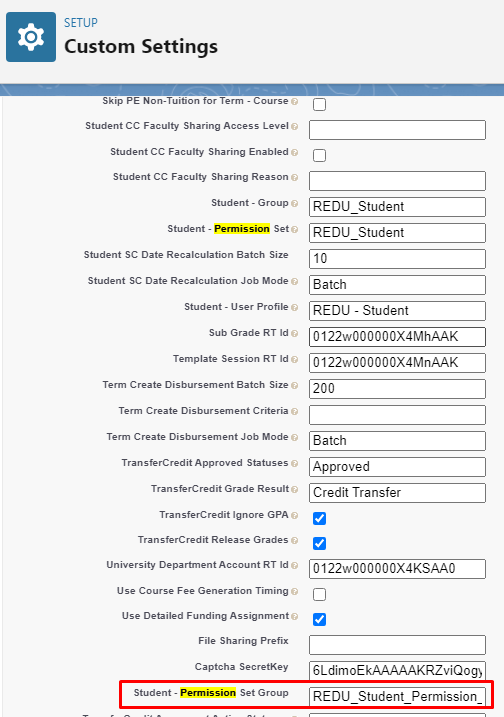
Note:
Depending on your use cases, you should check the REDU_Student_Permission_Group and ensure that it contains the permission sets you want for your student.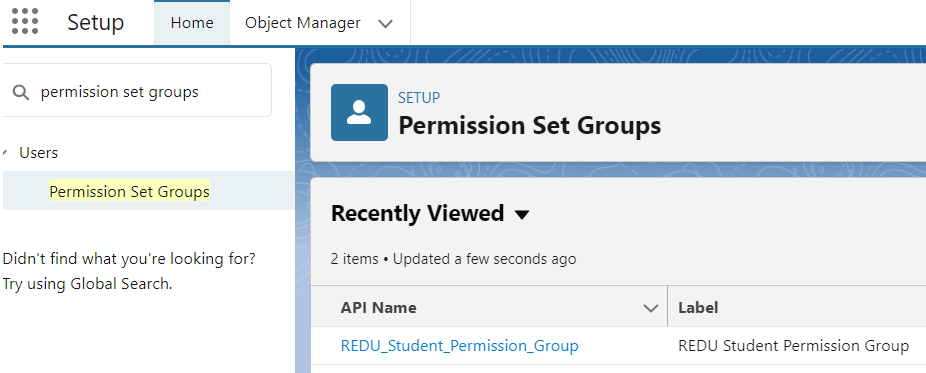
For example, if you want your students to be able to apply for scholarship and housing, then, make sure to add the relevant permission sets.
Self Registration
- Login to Salesforce and go to “Setup”.
- From Setup, in the Quick Find box, enter Digital Experiences.
- Go to All Sites and then “RIO Education Community” and click on "Builder".
- From the top menu, search for Register. Then, select the page.
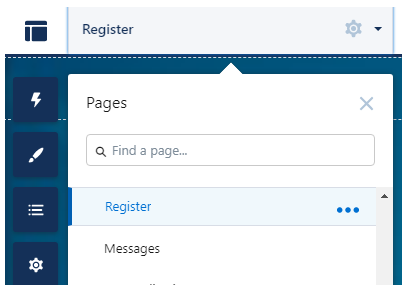
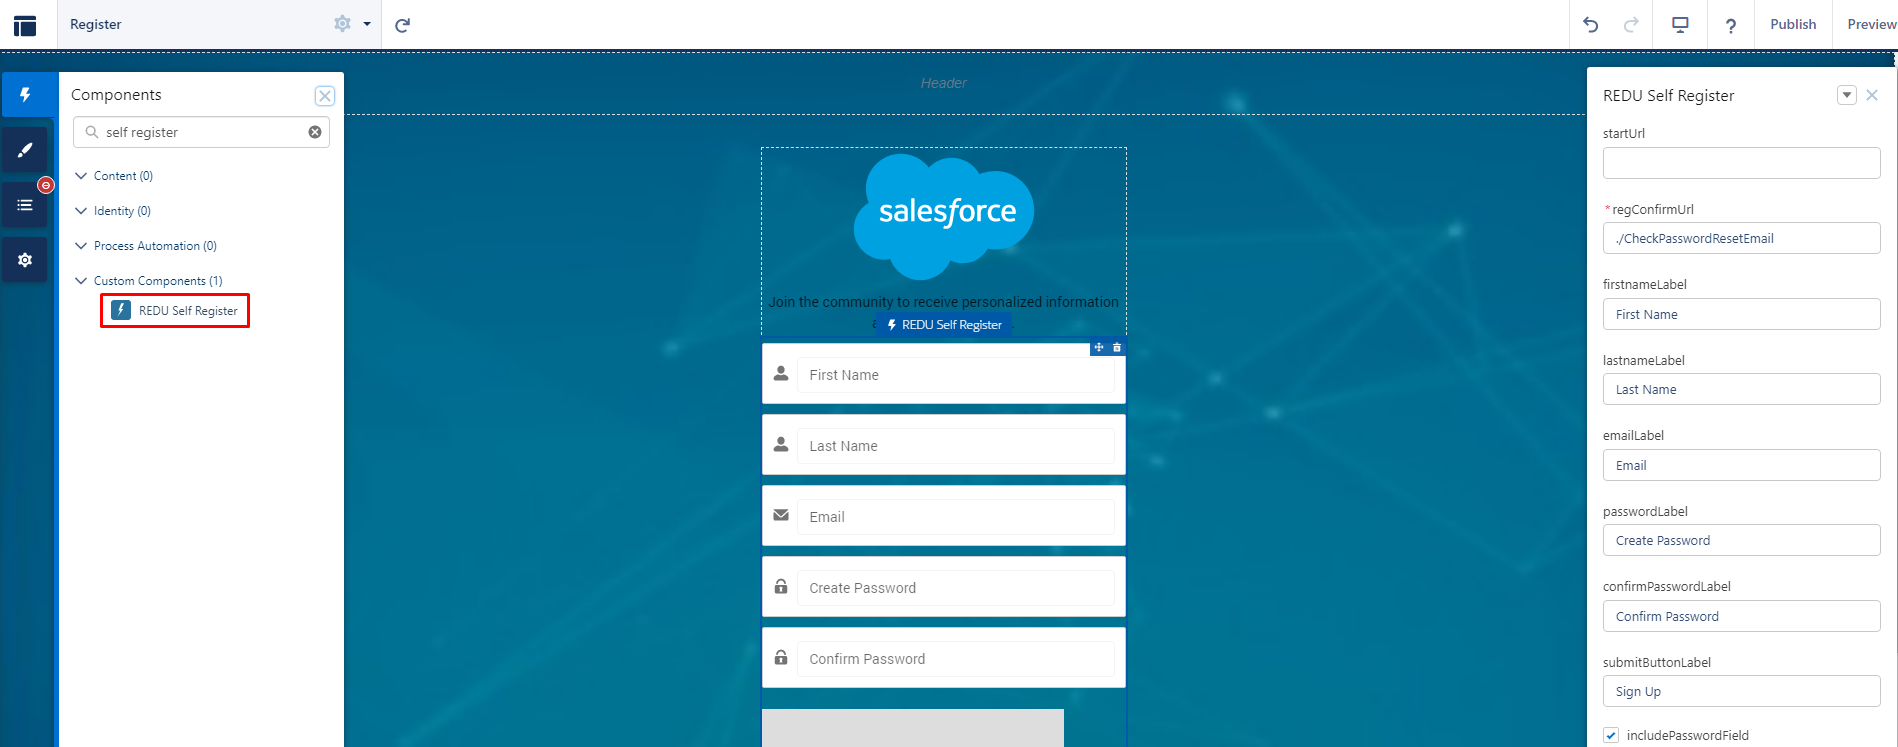
- Replace the existing Self Registration component with REDU Self Register.
-
Note:
You might encounter an error on reCAPTCHA.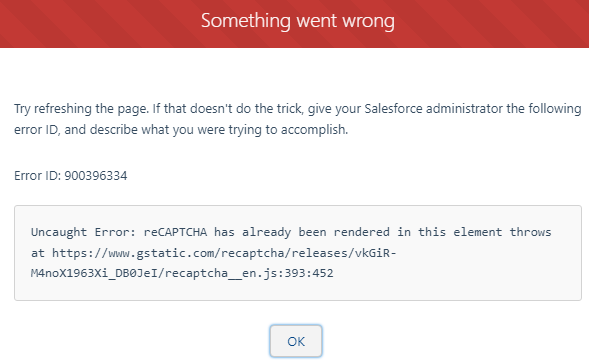
- If you don't intend to set up reCAPTCHA, open Settings >> Advanced.
Then, click on 'Edit Head Markup'.
Remove the entire script in the popup box.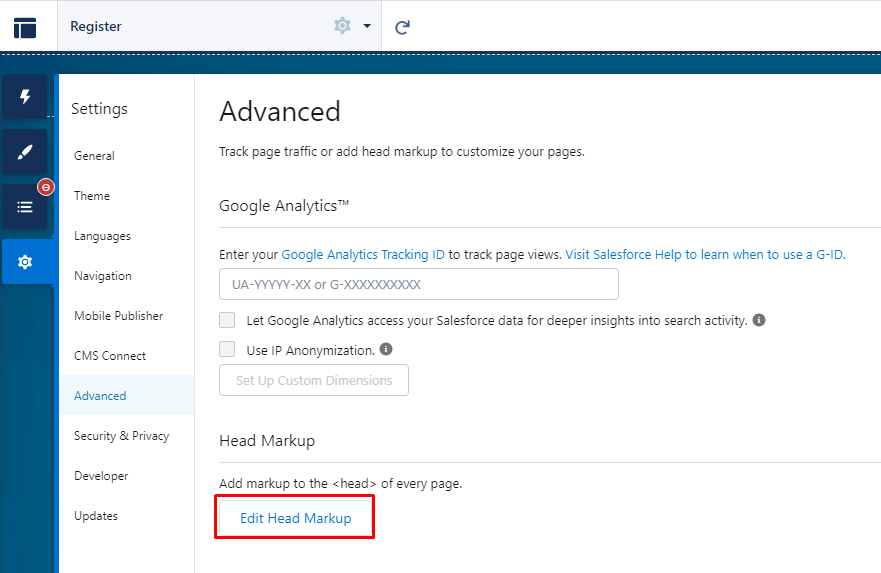
- But if you intend to set up reCAPTCHA, just click 'OK' on the error message first and ignore it for the time being.
Do steps 6 and 7 first, before doing step 8 later.
- If you don't intend to set up reCAPTCHA, open Settings >> Advanced.
-
Note:
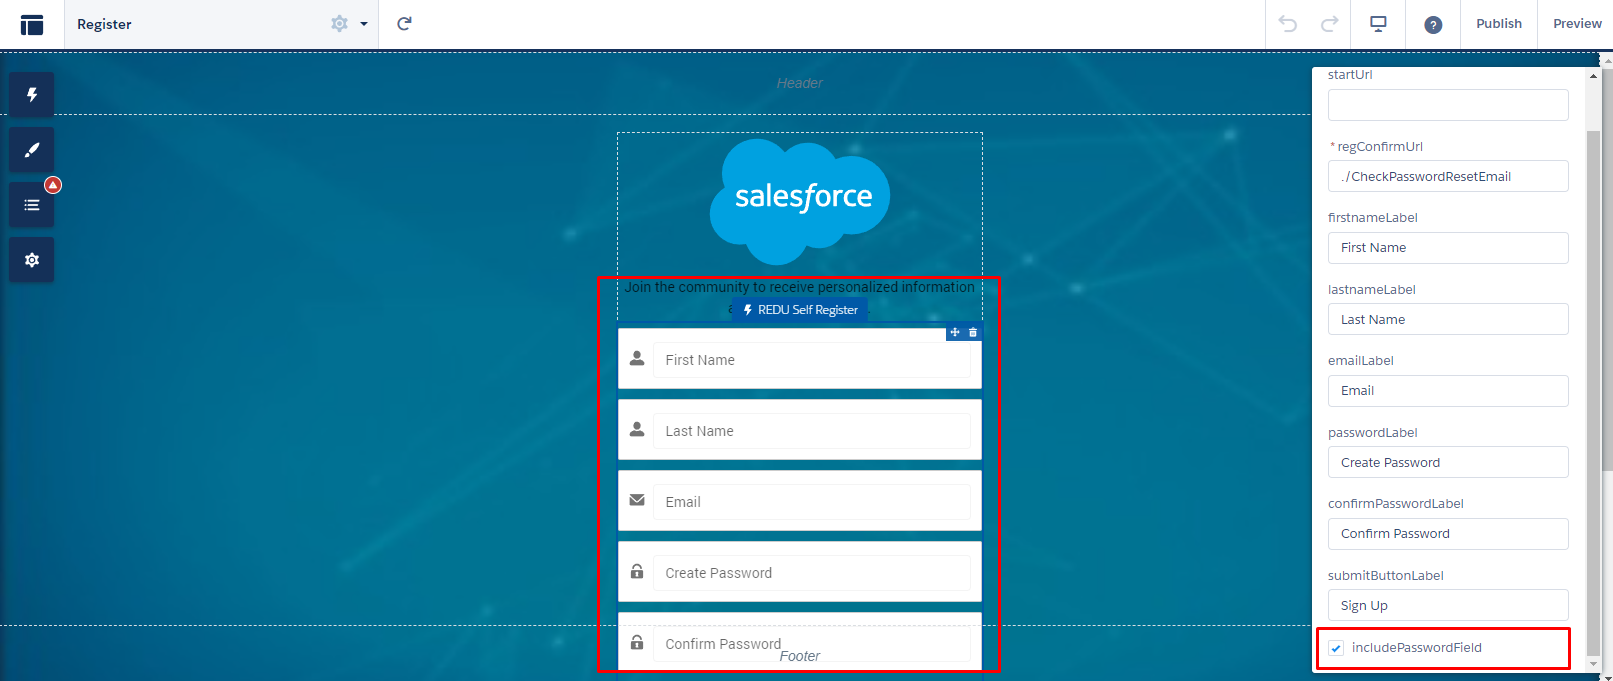
- On the component properties, make sure to check the 'includePasswordField' checkbox (if unchecked, the Self Registration will have additional Email confirmation step where the user must set the password).
- To activate the automation that will be giving the Student Users their Permission Set Group:
- Open the Developer Console.
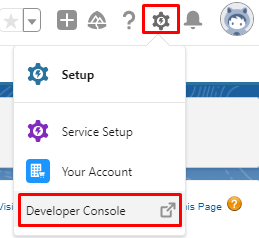
- Go to Debug (on the top menu) -> click on "Open execute Anonymous Window".

- Paste the following and execute:
redu_USR_AssignCommunityPermSet_TDTM.installTDTMSetting();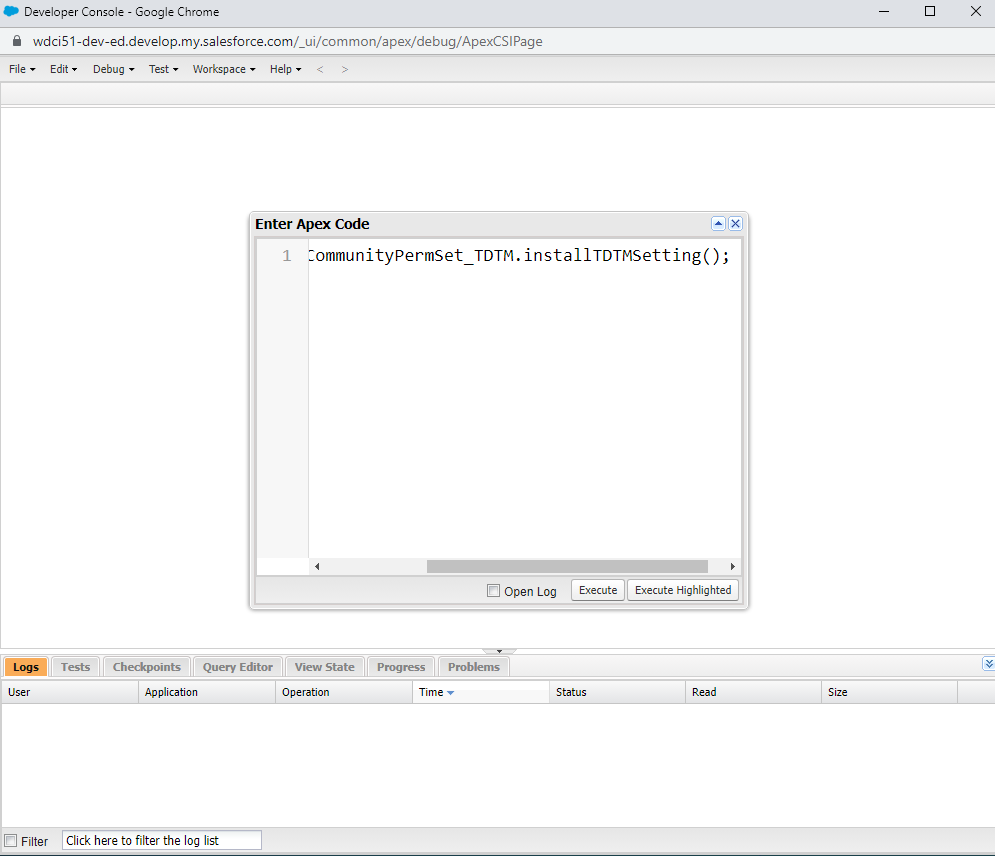
- Open the Developer Console.
-
(Optional)
If it is needed, the reCAPTCHA layer can be added and activated to prevent spam on the Registration.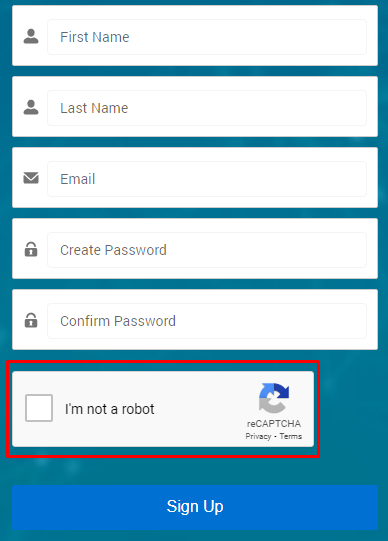
For instructions on setup and activation of reCAPTCHA for the RIO Ready Self-Registration function, please see here.
Existing Student
- Login to Salesforce and go to “Setup”.
- From Setup, in the Quick Find box, enter Digital Experiences.
- Go to All Sites and then “RIO Education Community” and click on "Builder".
- From the top menu, create a New Page.
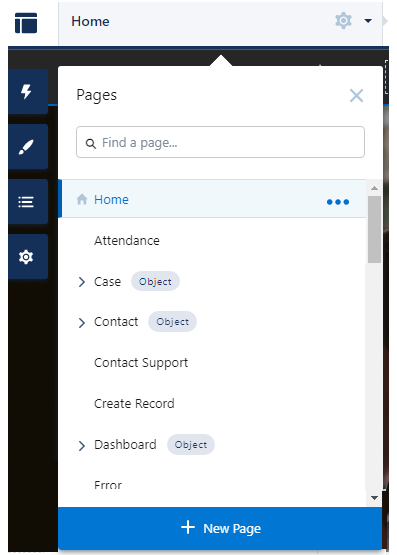
- Select Standard Page then New Blank Page.
- Choose your layout and then enter the following:
- Name: ExistingStudent.
- URL: ExistingStudent.
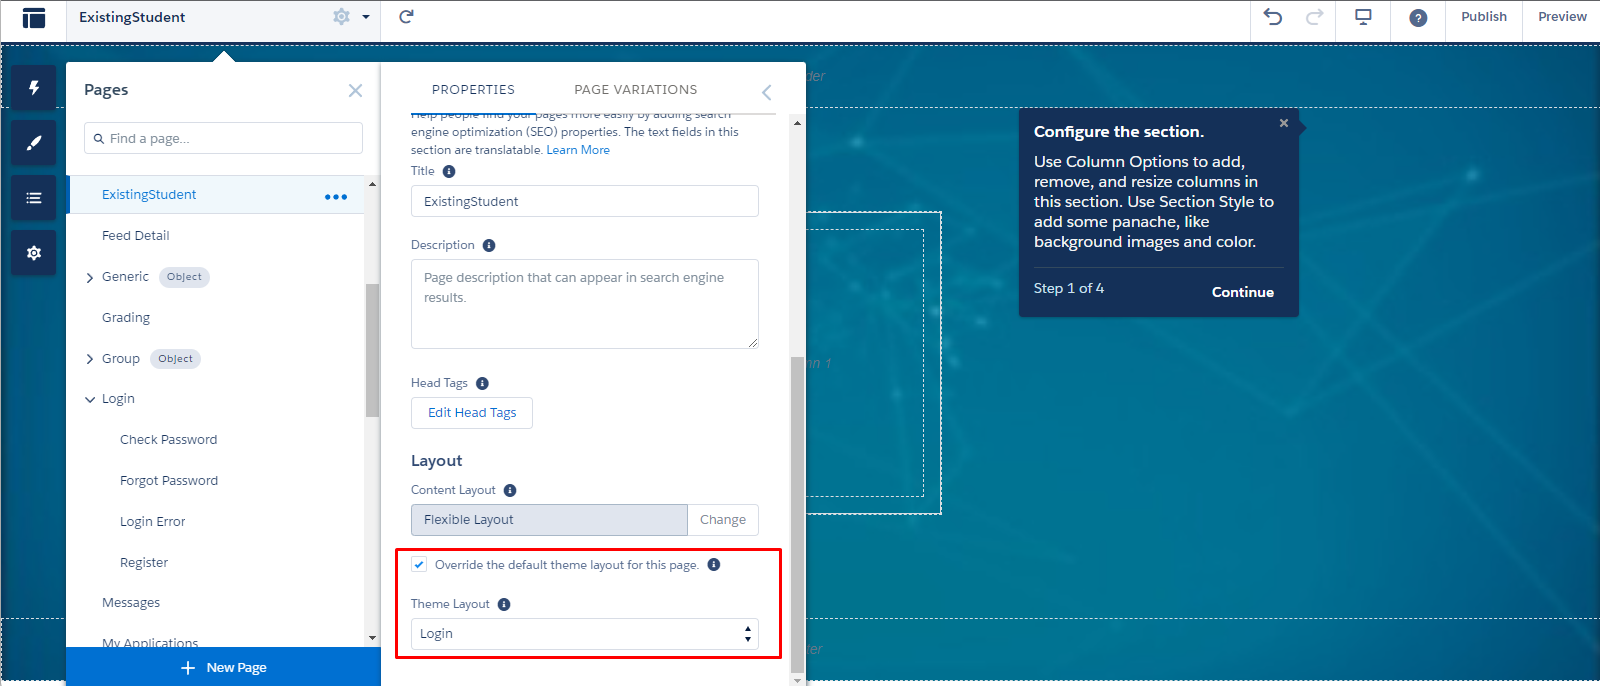
- Under the layout setting, check the "Override the default theme layout for this page." and set the Theme Layout as "Login".
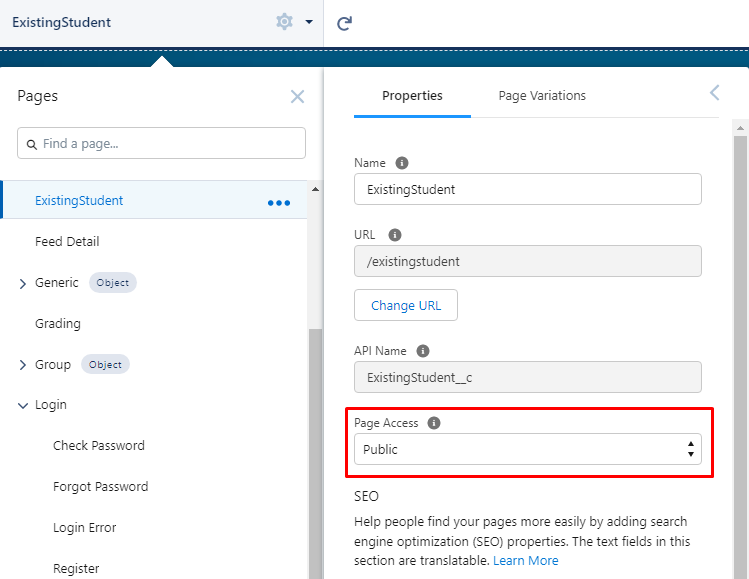
- Make sure to set the Page Access to 'Public'.
- In the Components, enter Existing Student.
Drag and drop the REDU Existing Student component into the desired section of the page, then, publish the page.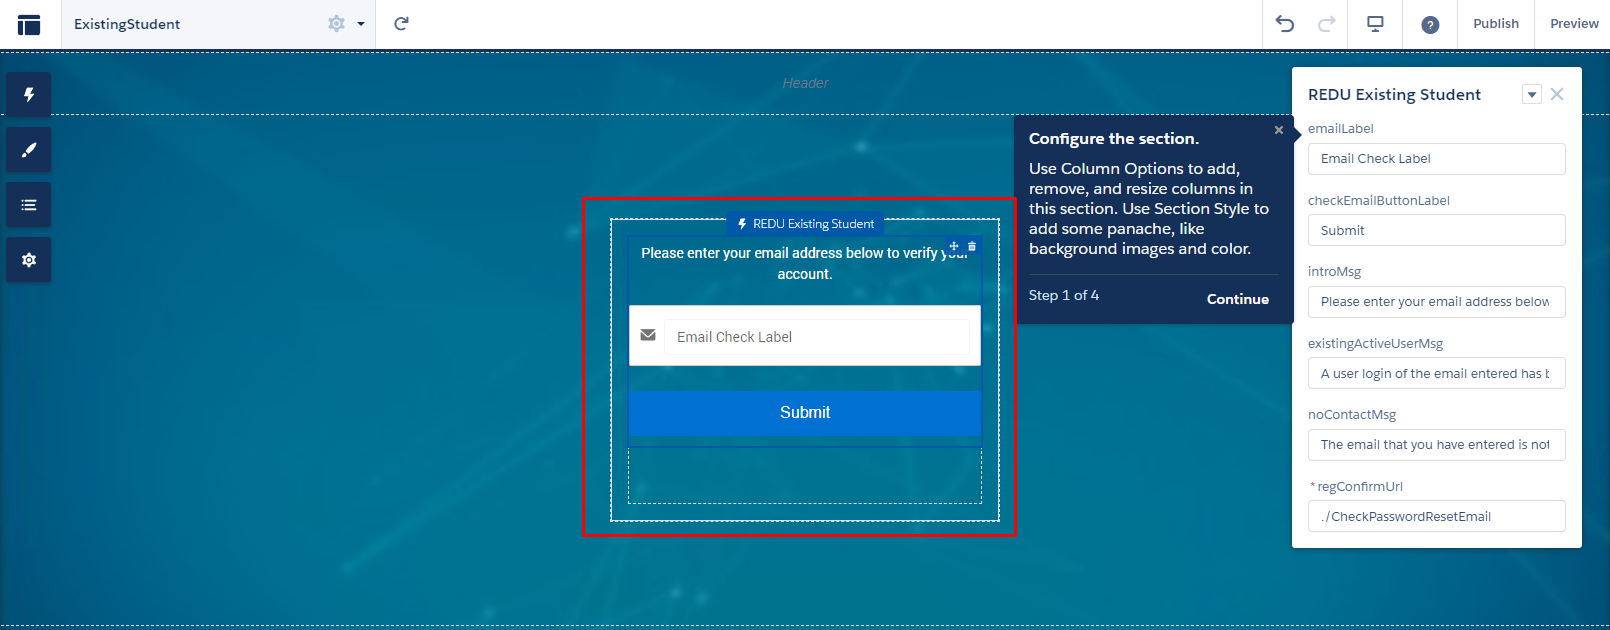
- Then, head on to the REDU Login Form in on the Login page. Go to its properties and update the existingStudentURL, for example, /portal/s/ExistingStudent.
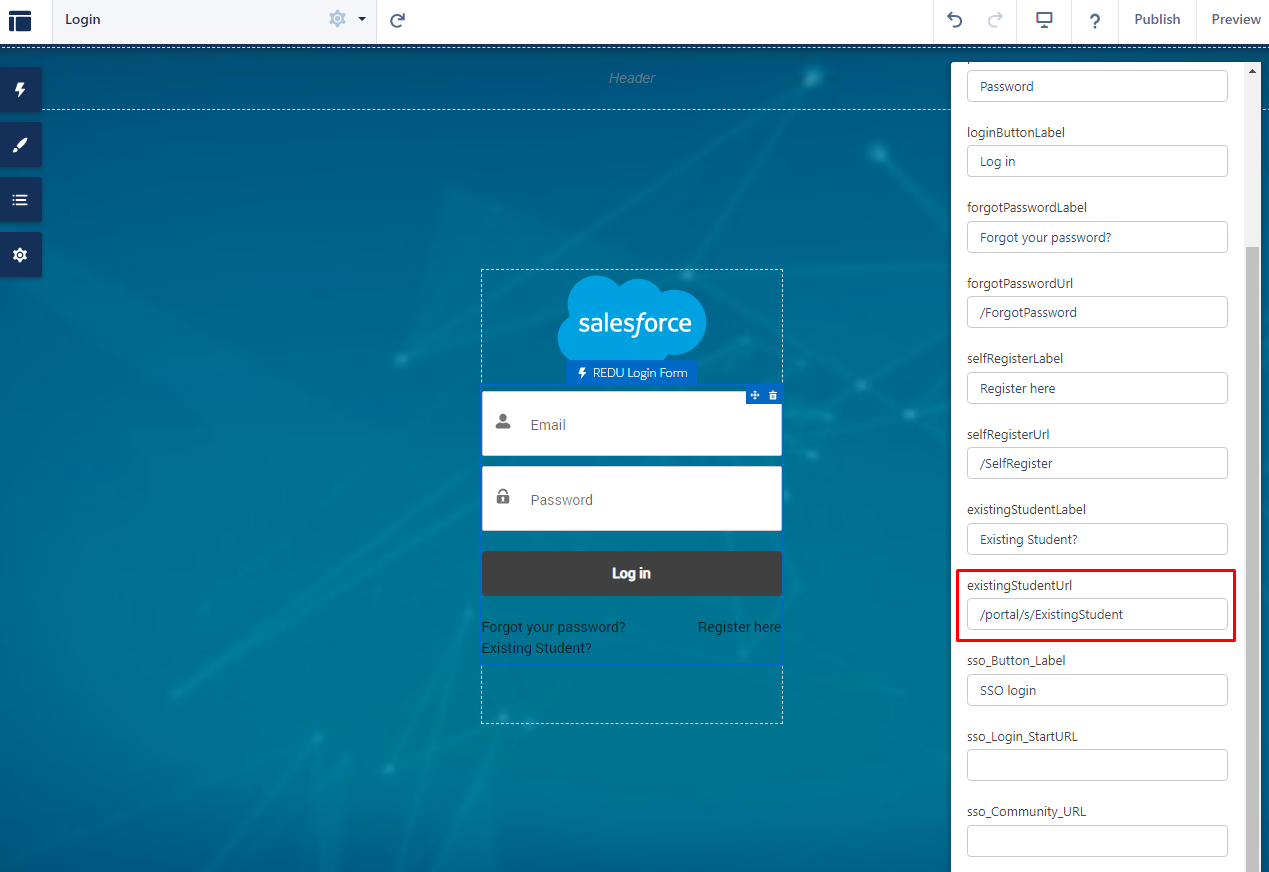
- The URL for Existing Student check page is relative, so since the Login page is located in:
*your community domain* / *suffix* / s / loginIt will look like this example: https://rio-ready.force.com/portal/s/login/
And if we put /ExistingStudent on the Self Registration URL, the link will send the user to:*your community domain* / *suffix* / s / login / ExistingStudentExample: https://rio-ready.force.com/portal/s/login/ExistingStudent
- If the existingStudentUrl is left empty, then the link for Existing Student will not appear.
- The URL for Existing Student check page is relative, so since the Login page is located in:
- Publish the changes.
Community Workspace
The page that the 'Forgot Password' and 'Register Here' will redirect the user to depends on the Page set in the Community Workspaces Administration under the Login and Registration section.
- Note: If the Community is not set to allow Users to self register, then the 'Register Here' link will not appear.
Also, the Default Owner of the Record generated by the Community can be found in Community Workspaces Administration under the Preferences.
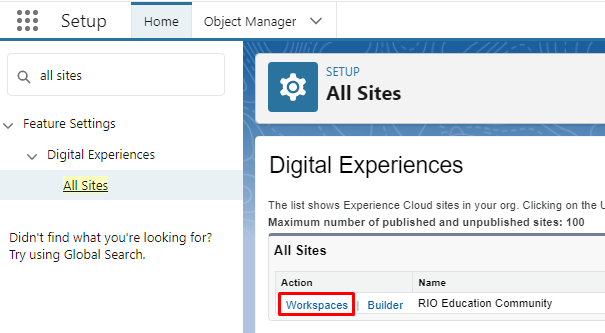
- Navigate to Setup >> Digital Experience >> All Sites >> RIO Education Community and click on "Workspace".
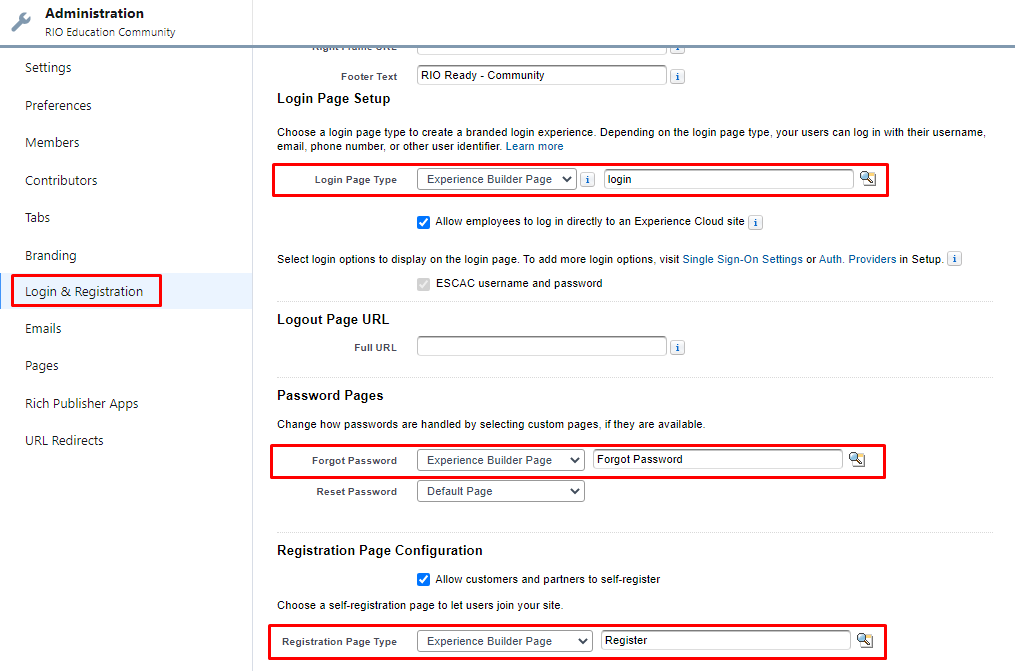
- Select the Administration >> Login & Registration, update the forgot password pad and registration page as below.
- Login Page Type >> Experience Builder Page >> Login.
- Forgot Password >> Experience Builder Page >> Forgot Password.
- Registration Page Type >> Experience Builder Page >> Register.
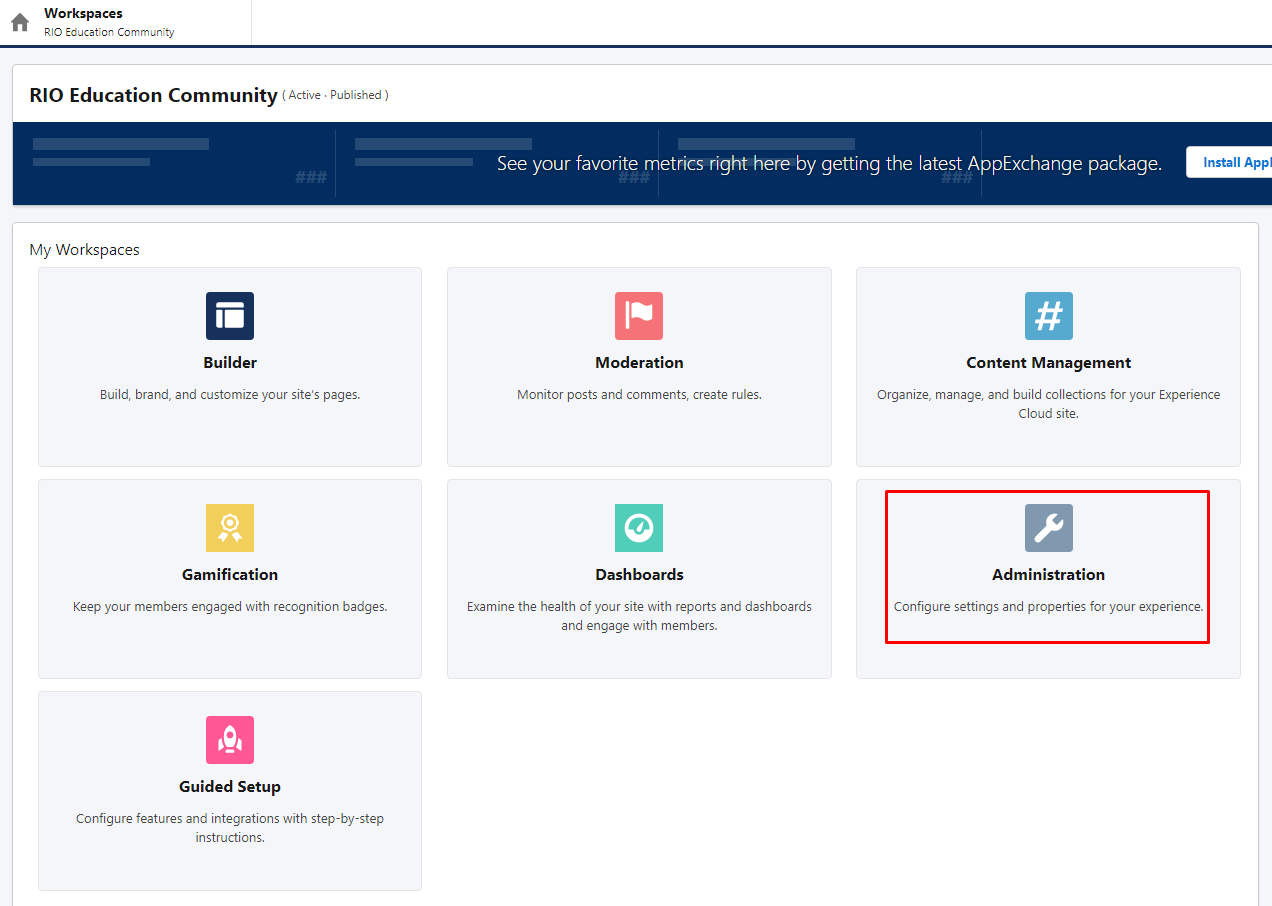
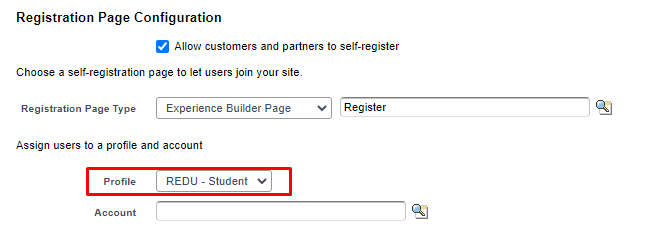
- On the same page, make sure that the Profile is the REDU - Student (or your own custom student profile that you have made).
- If there is none to select, then, head to 'Members', and add the profile to the 'Selected Profiles'. In this scenario, it is the REDU - Student, but you can include your own custom student profile (if any).
Also make sure that you have the Permission Sets as in the image below as well.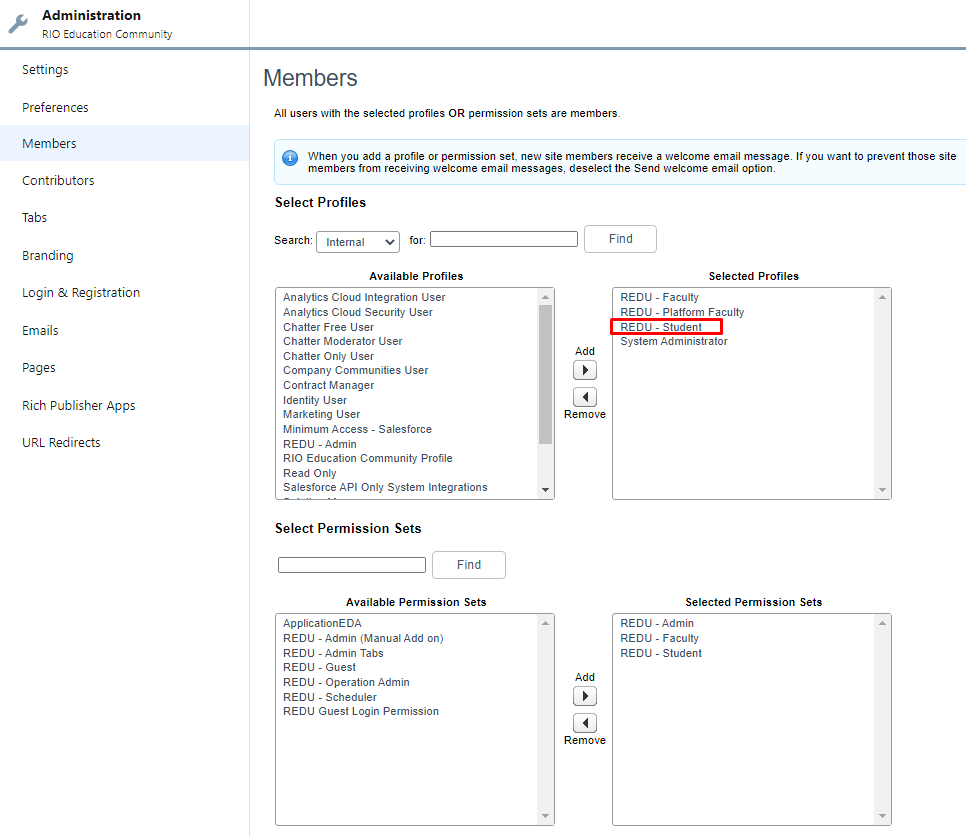
- If there is none to select, then, head to 'Members', and add the profile to the 'Selected Profiles'. In this scenario, it is the REDU - Student, but you can include your own custom student profile (if any).
- Navigate to the preferences tab and configure the Default Owner for the record created by the guest user.
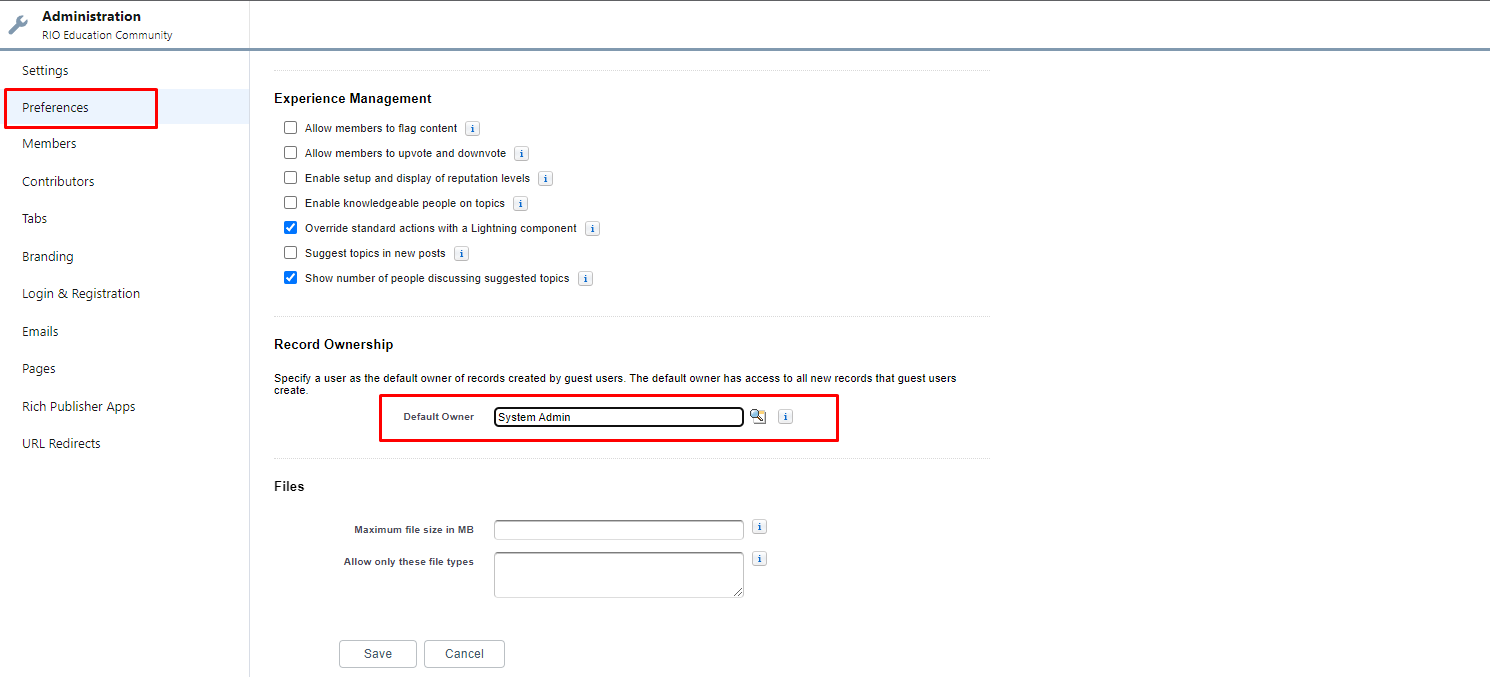
This User will be the Default Owner for any record created (e.g. uploaded files) by the guest user, since the guest user has no User record.-
Thus, it is important to ensure that the User acting as Default Owner has a Role.
To check whether the Default Owner has a Role, navigate to Setup >> Users. Then, open the User record to see if a Role has been assigned.
-
If there is no available Role, you must create a Role and assign it to the User.
To create a Role, navigate to Setup >> Roles.
-
Thus, it is important to ensure that the User acting as Default Owner has a Role.
- Navigate to the Emails tab then go to Sender section.
Set the Email address to the appropriate customer email address for the community (whether that be no-reply address or the community administrator).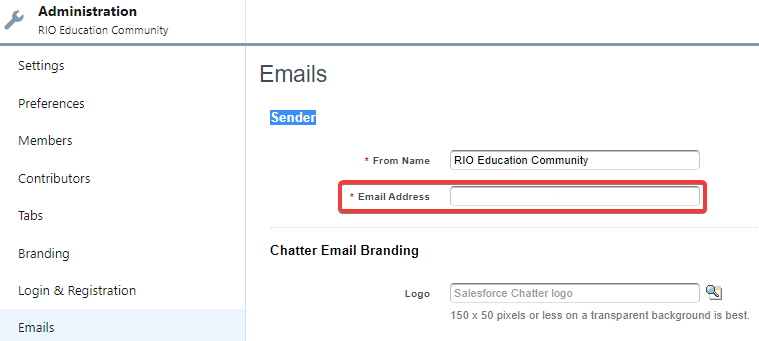
Completion
And that wraps up the process of setting up your Login and Self-Registration for your Community.
New applicants will be able to sign up, while existing students can login to the Community.
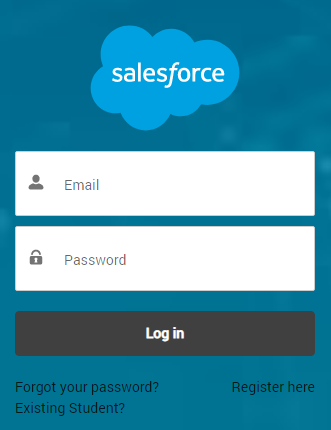
Take note of Salesforce's password requirements: Set Password Policies.