Table of Contents
Overview
This article will explain how an institution can handle students' request for accommodation and assign them to suitable rooms based on needs/requirements.
Note: This will require the Housing Extension Package and the RIO Ready: Housing Application Form.
(Check out our slides here, or try out our RIO Challenge here for a practical exercise.)
Use case
A student named Paul is requesting for accommodation on campus grounds.
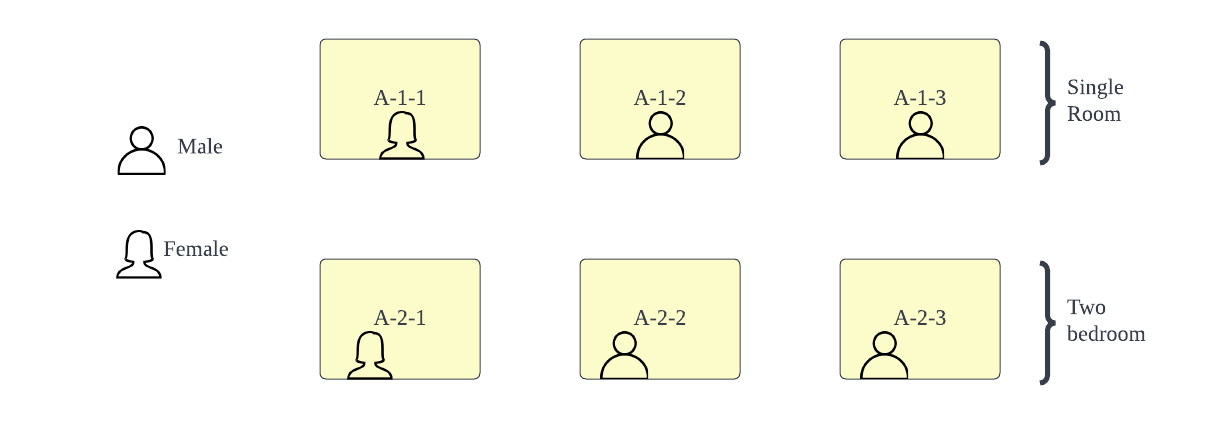
The student is male, thus, he should be assigned with only male roommates (since there are no available single rooms left).
Paul will make a Housing application via the Student Portal (Community), where he will fill a form to provide his information as well as requirements and medical conditions (if any).
For example, the application form will ask the applicant's sleeping time preference. In Paul's case, he has specified that he prefers sleeping before midnight (meaning he should be paired with a roommate that does the same).
Once the request form has been submitted, a Housing application record will be automatically generated in the admin console.
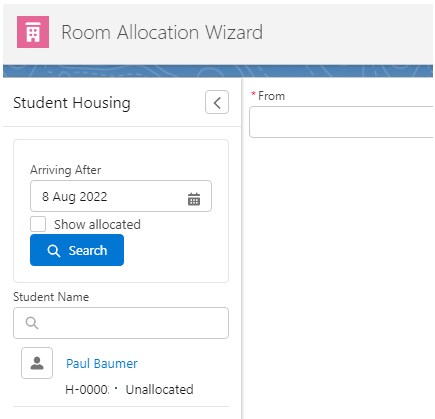
Admin will then use the Room Allocation Wizard, to identify Paul by narrowing down the list of students based on the arrival date.
When searching for rooms, the admin can compare available rooms and suitable roommates that sleep before midnight, which will be a good match with Paul's preference.
See below on setting up records of facilities (i.e. rooms, dormitories) for student accommodation.

The admin can then allocate Paul to that room. It will now be fully allocated and reflected accordingly.

Video
Here is a sample recording on how to use the Room Allocation Wizard.
Unallocate / relocate students
There might be situations where a student:
a) opts out of the accommodation, or,
b) wishes to change rooms.
Head to the Room Allocation Wizard, and search for allocated students (i.e. students that are already provided with accommodation).
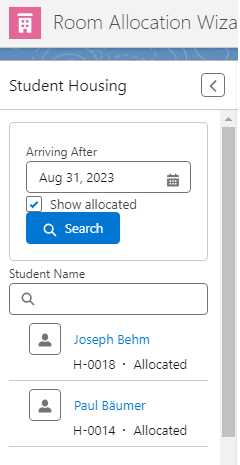
Situation (a) would require the admin to unallocate the student from the room.
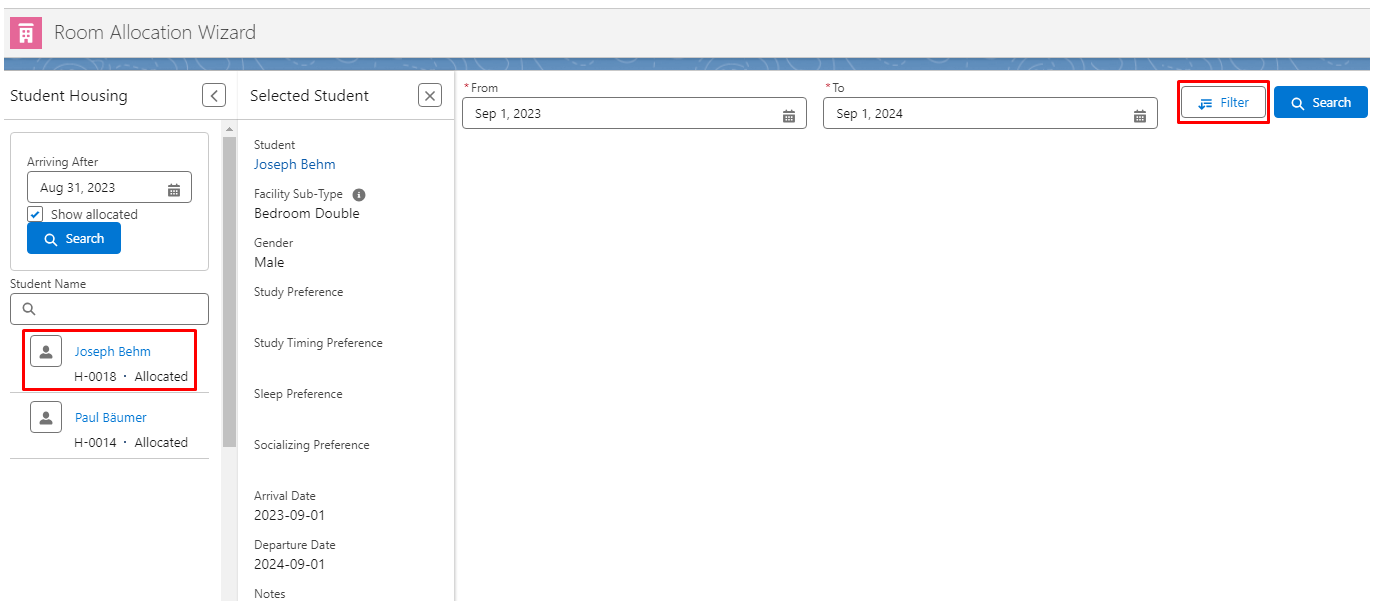
For example, the student Joseph is leaving the university. To unallocate him, click on the student, and click on the Filter.
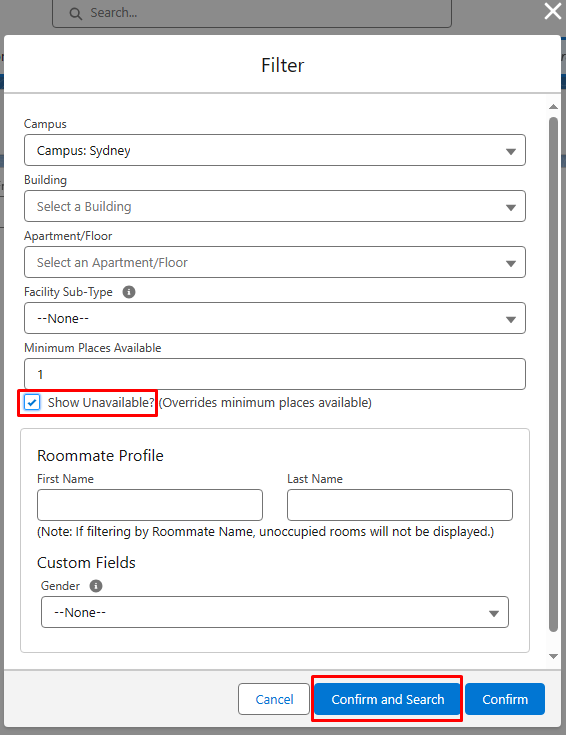
Click on "Show Unavailable?" and "Confirm and Search".
This is to ensure that the wizard will display all rooms, even those that are already fully allocated (since the wizard by default would not show unavailable rooms).
The student Joseph can then be unallocated, and the room will be available for other students now.

Situation (b) would require the admin to relocate the student to another room.
For example, the student Paul wishes to move to a different room. To relocate him, click on the student, and click on the Filter.
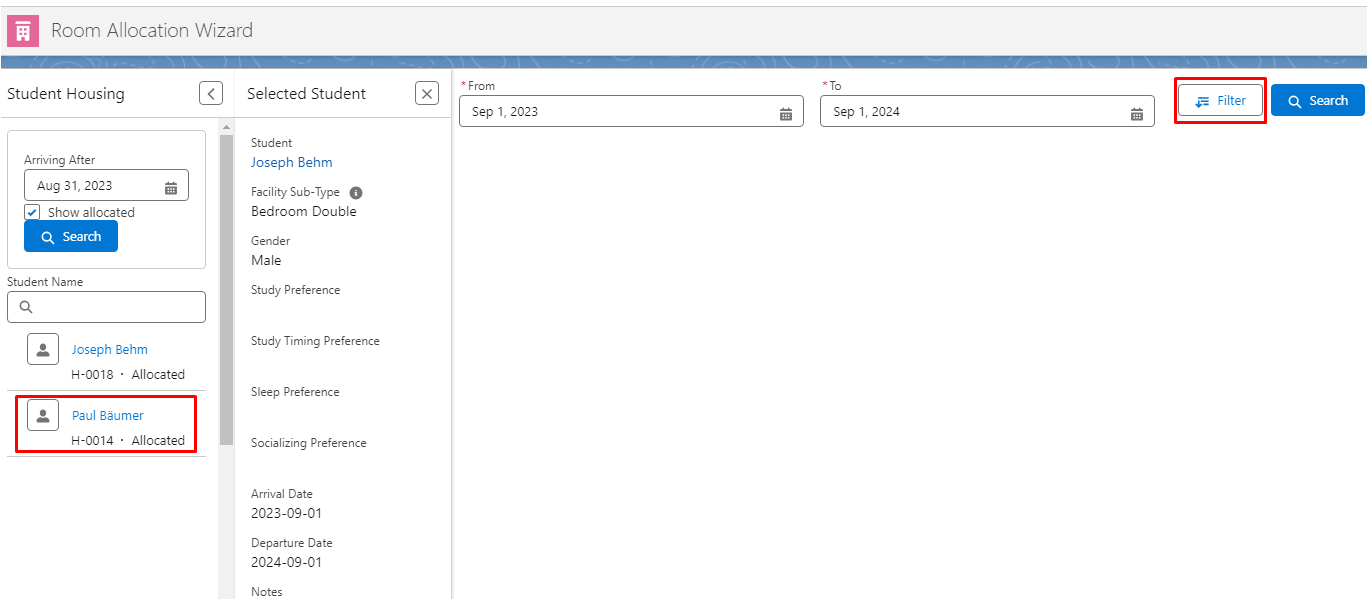
Similar to situation (a) seen above, ensure that the Filter has "Show Unavailable Rooms?" enabled (checked), so that all rooms will be displayed, including allocated ones.
Find and unallocate the student first (from his current room).
Then, search for the new room and allocate it to the student, to complete the relocation process.
Housing fees
When a student opts for accommodation, they will be billed according to their room type.
This will be linked to the student's Program Enrollment, where the Student Fee will contain a Fee Line for their Housing.
To setup and generate this, see here for a detailed guide.
Configuration
Housing Application form
To setup the form for the student to apply for Housing, see here.
Room Allocation Wizard and facilities
To find out more on configuring the Room Allocation Wizard and facilities for this feature, see here.