[Advanced] C05.1 - Application Checklist
Table of Contents
RIO Challenge C05.1 - Application Checklist
It is commonly required for applicants to submit some supporting documents during their Program application process. Some applicants might also have different requirements to fulfil. For example, postgraduate students might need to upload extra documents such as their research proposal.
The application checklist can be a useful tool to aid admission team members. The checklist allows them to keep track of the required items and handle tasks seamlessly for every individual application.
Pre-requisite challenges
Before trying out this challenge, it is recommended to complete these first:
Learning outcomes
Understand how to:
- Set up the Application Checklist.
- Perform the action items on the Application Checklist within the Student Portal.
- Review and update the status of the submitted supporting items.
What does success look like?
- An Application Checklist has been set up to accompany a Student's Application for Enrollment.
- Students are able to upload documents required by the application process.
- Admission team member able to review and manage the completed task based on the application checklist.
Reading material
Estimated time to complete
30 minutes.
Steps to complete the challenge
RIO University has a list of requirements that must be included with every prospective student’s application. There are different sets of requirements (known as Requirement Set Template) for different students, depending on the type of program they are applying for.
According to the following diagram, there are 3 different sets of requirement lists in RIO University.
- The ‘General Requirements’ list contains common actions required for all students whom wishes to apply in RIO University.
- The ‘Undergraduate Requirements’ list are required actions only applicable to students who apply for the Undergraduate Program.
- The ‘Postgraduate Requirements’ list are required actions only applicable to students who apply for the Postgraduate Program.

Follow the steps below to understand how the requirement checklist can be setup, and to discover the benefits of having it during the application process.
-
Click on the 'RIO Challenge V2' tab at the bottom left of the page. Click on 'Initiate Challenge' to generate the data required for this challenge.

-
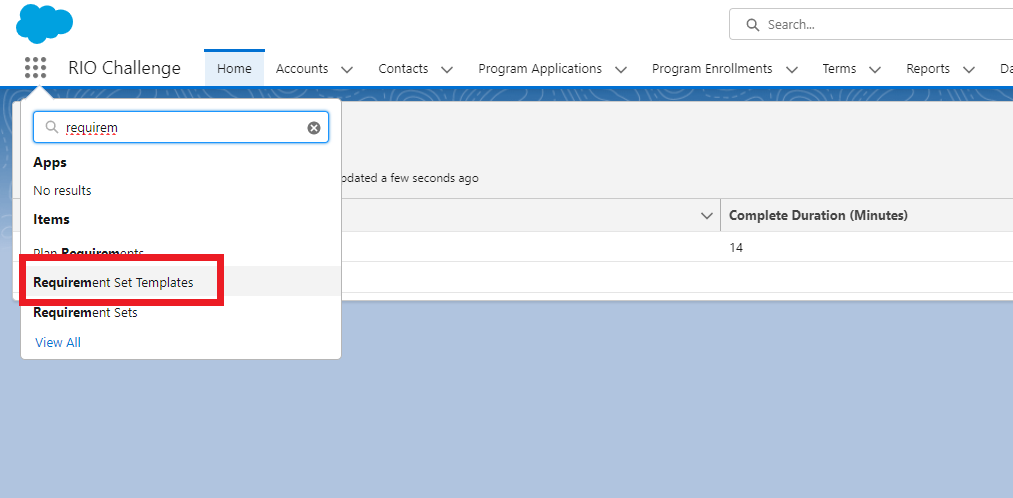
Launch the 'Requirements Set Templates' menu from the app navigation, and select the list ‘Challenge 5.1 - Application Checklist'.
-
The list view will contain 3 records. Select 'C05.1 - General Requirements'.
We will then be navigated to the setup page for the requirement set template. We can setup the conditions / criteria for this requirement list in the 'Configuration' section under the 'Details' tab.
Meanwhile, the requirements are defined at the 'Requirement Templates' located at the right panel.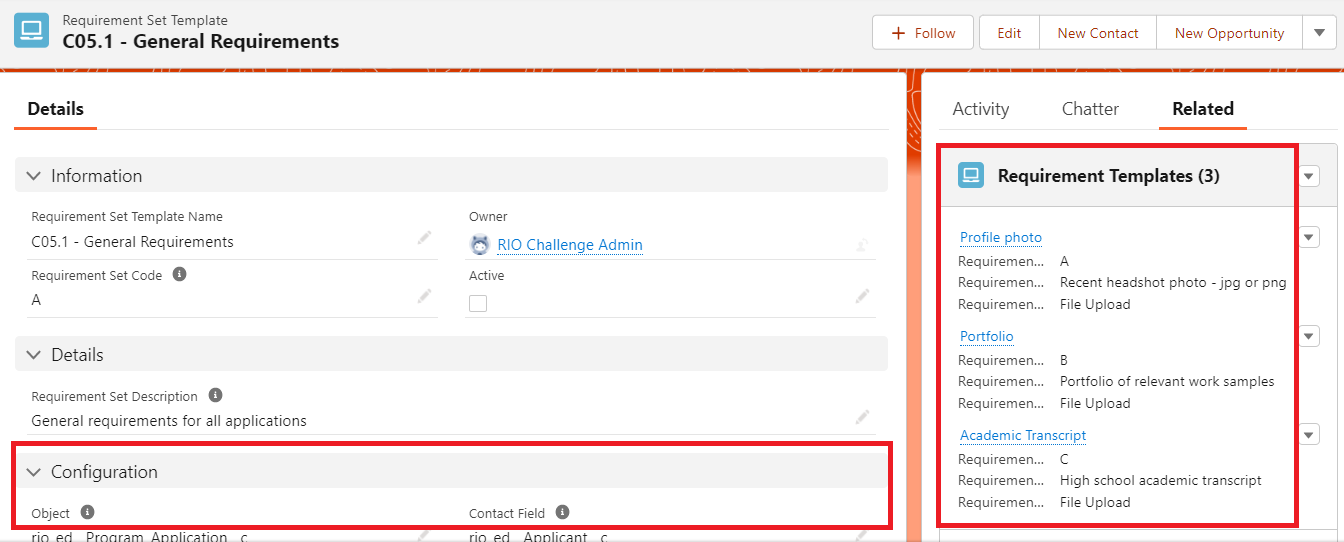
- Now, let's setup the condition for each requirement set template.
Under the 'Configuration' tab, enter the correct value for 'Criteria Field' and 'Expected Value' according to the following table.
Don't forget to also activate each of the requirement set template by checking the 'Active' checkbox to true.
(Note: Repeat this step for the remaining 2 requirement set templates.)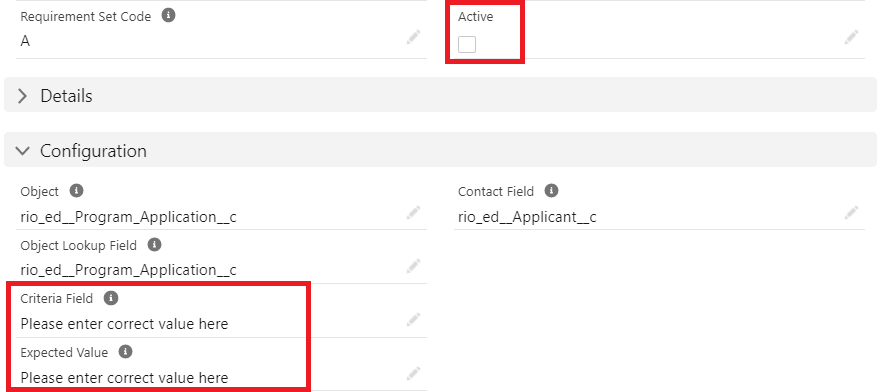
Requirement Set Criteria Field Expected Value Active General Requirements
(Set Code A)rio_ed__Status__c Submitted True Undergraduate Requirements
(Set Code B)redu_Program_Name__c C05.1 - Bachelor of Business Management True Postgraduate Requirements
(Set Code C)redu_Program_Name__c C05.1 - Master of Business Administration True
-
After setting up the conditions for each requirement set templates, let's navigate back to the 'General Requirements' requirement set template.
Click on the 'Requirement Templates' tab at the right panel to view all the requirements for this list.
The 'Requirements' listed are checklist items that belong to this set, which will be generated when the conditions we set earlier are met.
-
The admission team would like to add another requirement to this set, as an internal reminder to do a student background check at this stage.
Click 'New' to add the new requirement with the following details.Requirement Name Student Background Check Requirement Code D Sequence 4 Requirement Type Action Requirement Visibility Internal Priority Normal Due Days 21 Requirement Detail Confirm student has never been expelled from RIO University. Check Criminal History.
Since the Requirement Visibility is 'Internal', it will only be visible to the Admin.
Students will not be able to see it, since it is not meant for them to do.
-
After completing all the setups, let's take a look at the application checklist in action.
From the 'Contacts' menu, select the list 'Challenge 5.1 - Application Checklist'.
Click on the record created for this Challenge, then 'Log into Experience as User'.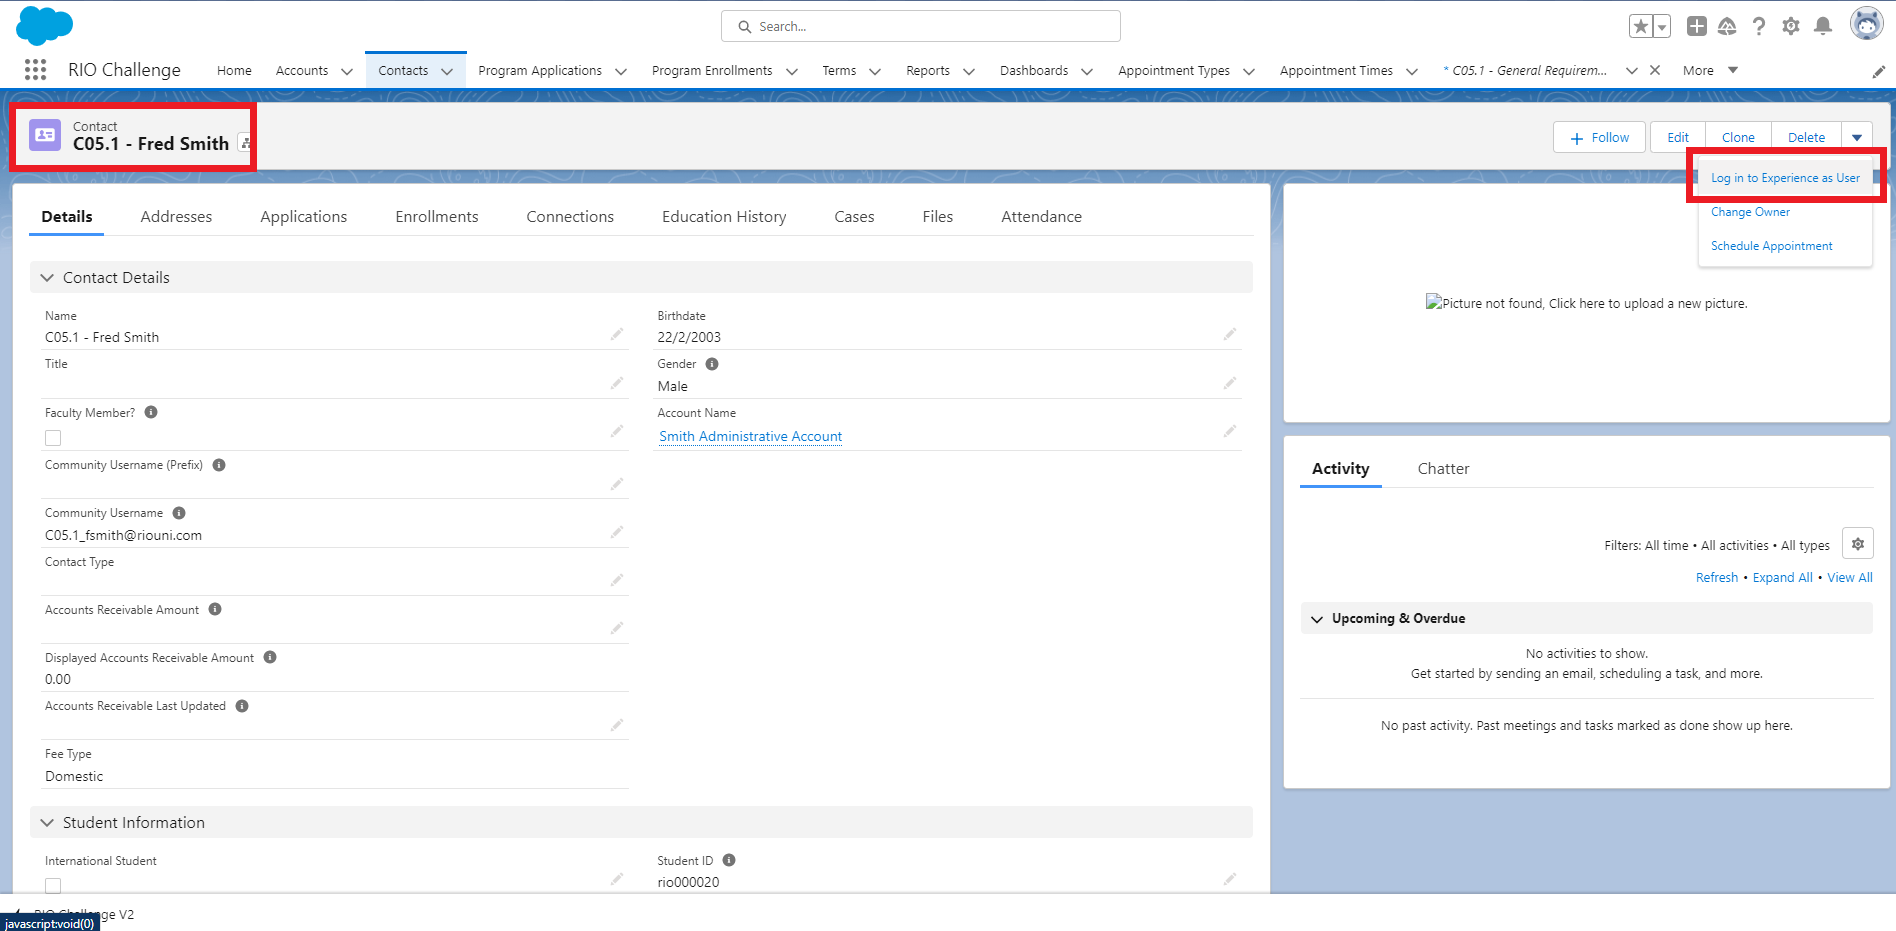
-
This will take you to the Student Community, which is the front-end portal that students will be interacting with.
Click on 'New Application' at the top navigation menu, then click on 'Program Application' in the next page.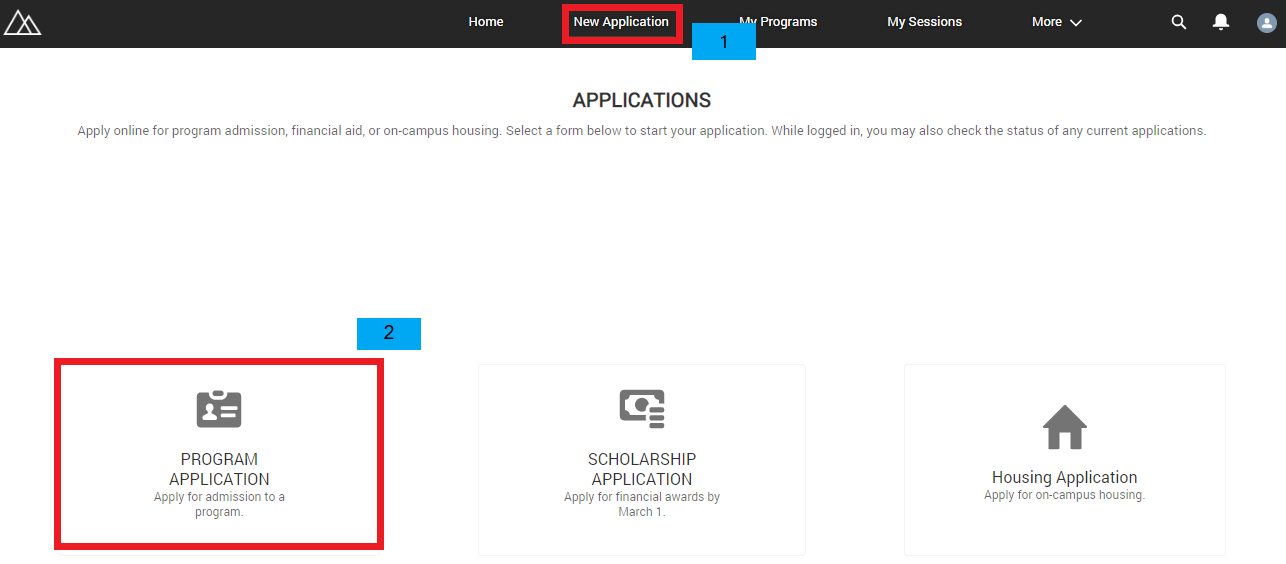
-
Fill in the following information and all other required information in the Program Application form:
Program Interested C05.1 - Bachelor of Business Management Mobile Phone 0123456789
-
Click 'Next' and fill in the following information:
Starting Term C05.1 - Future Term 1 Study Mode Full-time Payment Type Self Paid
Ignore the 'Do you have any previous education qualification' checkbox. Leave it as unchecked.
Click 'Next'.
You are not required to upload a Supporting document. Click 'Submit'.
The Program Application process is completed and will be marked as 'Submitted'.
-
Click the link to open Program Application record you just created.

-
Scroll down to view the generated checklist. You will notice that only the 'General Requirements' and 'Undergraduate Requirements' checklists will appear for the applicant, Fred Smith.
(Note: The 'Postgraduate Requirements' checklist is not generated because Fred Smith is not applying for a Masters program).
- Assuming this is what Fred Smith sees upon submission, let's start uploading a few documents.
Click on the 'Upload' button & select any mock files for 'Profile Photo' and 'Academic Transcript'.
After selecting the file for upload, click 'Close and Mark as Done'.
Note: Accepted file types are .pdf, .doc, .docx, .png, .jpg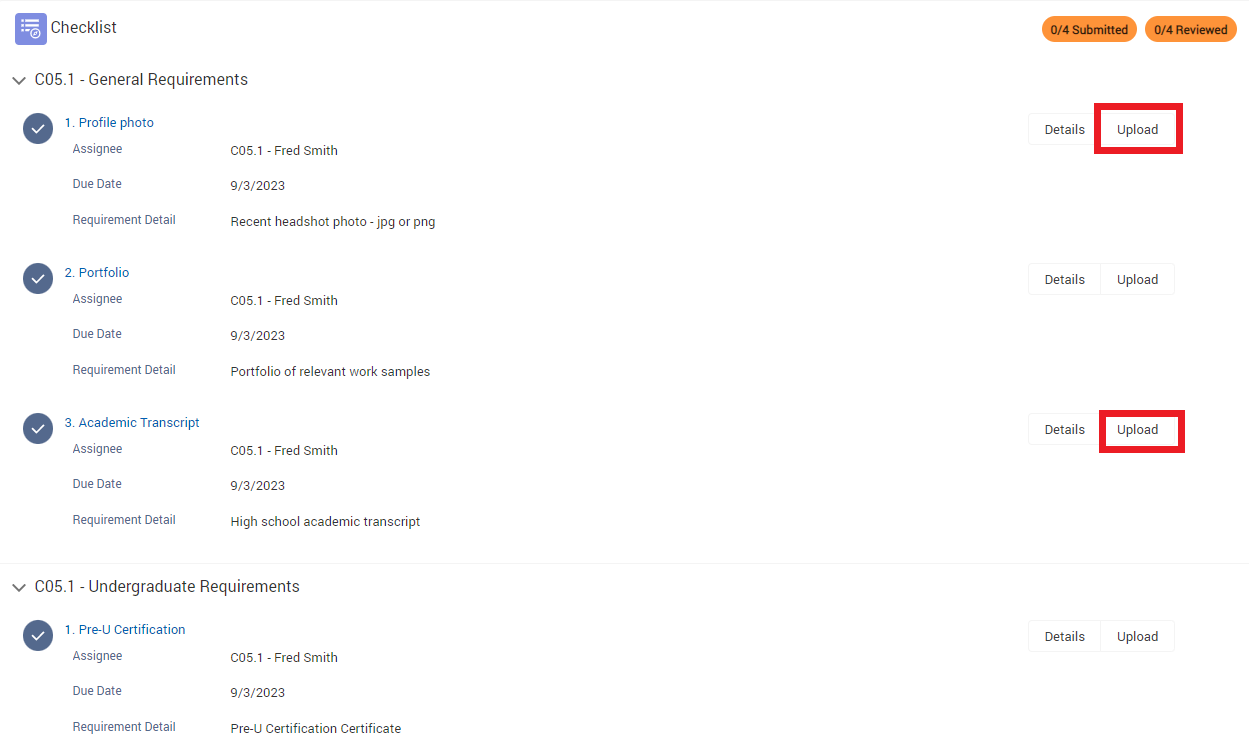
Notice that the checklist will show '2/4 Submitted' after you have uploaded the 2 documents.
- After submitting the mentioned documents, logout from the Student Portal and return to the Contact record.
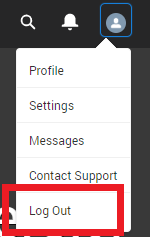
- From the Contact record, click on the 'Applications' tab, and select the Program Application ID for 'C05.1 - Bachelor of Business Management'.

- Assuming we are now playing the role as an admission officer, we will need to review and action the submitted requirements.
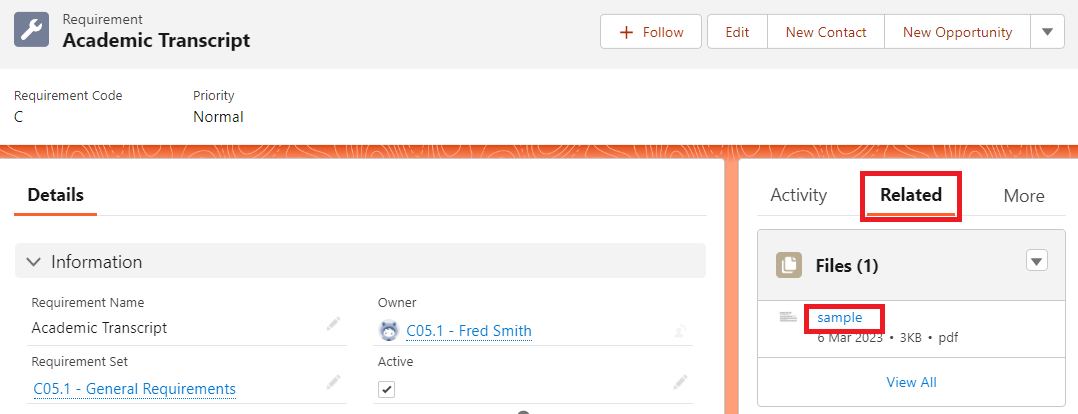
Firstly, let's review the submitted 'Academic Transcript' by clicking on the 'Details' button.
-
Then, at the right panel, navigate to the 'Related' tab and click on the uploaded file to review it.
- Assuming that the uploaded document is valid, let's update the 'Review Status' to 'Accepted'.

- Go back to the Program Application page. Notice that the checklist progress is updated to '1/5 Reviewed', after you have reviewed the requirement in the previous step.
(Note: You might need to refresh your page to view the latest update.)
- Now, let's proceed to review the next requirement.
Repeat steps 16 -17 for Profile Photo.
This time, let's assume that the student has submitted a 'selfie', which is an invalid photo.
In this case, we would like the student to resubmit a more appropriate photo.
In order to do that, uncheck the 'Submitted' checkbox, and leave the 'Review Status' as 'Open'.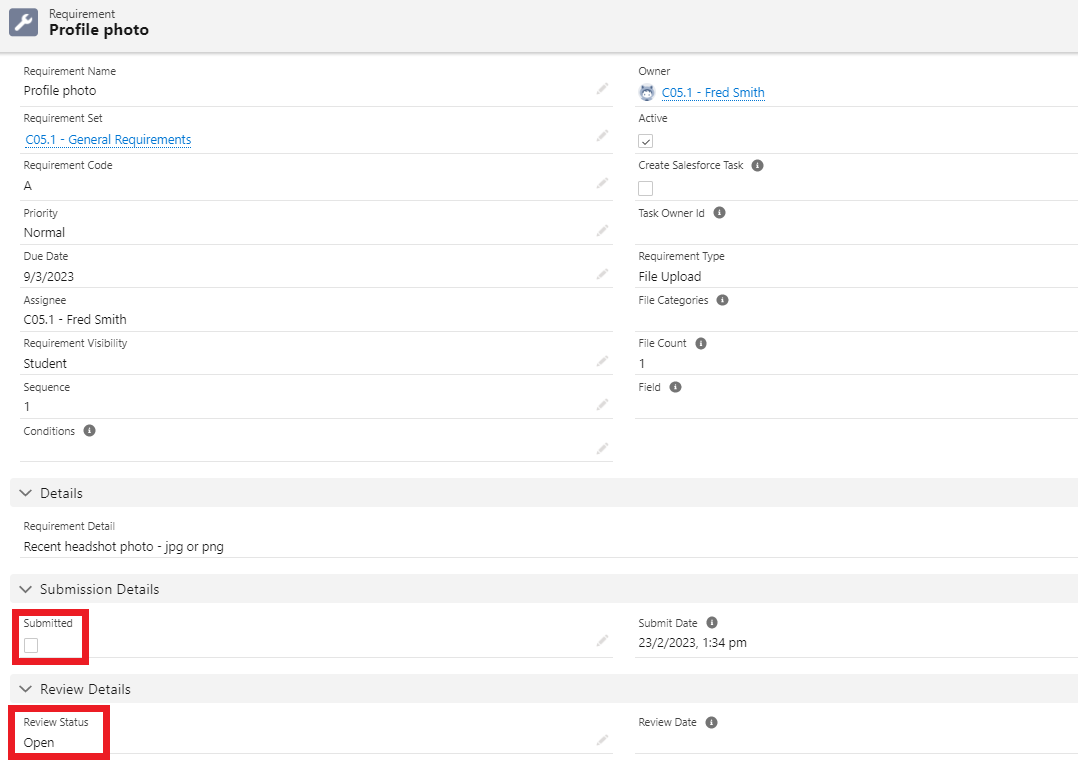
The checklist will be updated from '2/5 Submitted' back to '1/5 Submitted', since the applicant's 'Profile photo' requirement has been 'un-submitted' by the admin. The applicant will need to resubmit it.
In conclusion, the Application Requirement and Checklist feature allows the registrar team to set the requirements for applicants to fulfil (according to criteria such as the type of Program).
Applicants can view these requirements on the checklist, perform the required actions, and submit them for the registrar team to review.
The admin is able to review and respond to each item on the checklist once it is submitted by the prospective student and/or actioned internally.
- Congratulations, you have completed the challenge! Click on the 'RIO Challenge V2' tab at the bottom left of the page, and click on 'Complete Challenge'.
