Integrating to QuickBooks Online (QBO) with RIO Connect (Technical)
Table of Contents
Fields mapping and RIO Connect component
You can view the detailed fields mapping used by the RIO Connect: QBO for RIO Education here.
(Note: Kindly send us a request if you wish to access our Google documents. For more on our security policy, see here).
To learn more about integrations schedule and trigger points outlined in the fields mapping, check out the topics in the RIO Connect Fields Mapping Indexes.
Prerequisites
The following are the prerequisites to enable RIO Connect to connect with QuickBooks Online (QBO):
- Ensure that the RIO Education is installed successfully in the Salesforce Org. Please contact the RIO Education or consultant team if you require more information/assistance on RIO Education.
- Ensure that a QBO Apps is created in your respective QBO instance. A guide is available within QBO help pages (QuickBooks website).
Please take note of the client Id and client secret generated as it would be used for connecting to the correct QBO instance when ready.
Please also consider provisioning a sandbox access on top of the production, this would allow the RIO Connect Admin to perform a quick test prior to connecting to the production instance instead.
Callback/Redirect URLs to be included: - Nominate a Salesforce user (ideally with System Administrator profile) and with RIO Education license (in order to be able to access RIO Education’s component).
- Configure an OAuth enabled Salesforce Connected App (i.e. name it ‘RIO Connect’) with the following attributes:
- Callback URLs:
- OAuth Scopes:
- Full access (full).
- Perform requests on your behalf at any time (refresh_token, offline_access).
- Others can remain as default.
- Take note of the client Id and client secret generated via #6.
Things you can do before further enabling RIO Connect
Here are the installation/configuration steps that you can perform before further enabling the RIO Connect:
- Deploy the additional Salesforce components (this is available for download via the Salesforce Workbench Metadata package available here) required by RIO Connect. You can refer to the steps as outlined in the “To perform a Deploy operation” section here.
- It is recommended to work together with a Salesforce expert or RIO Education consultant if you are not sure of this step.
- Note that if you performed this in a Salesforce production instance and for security purposes, it is recommended to revoke the Workbench connection established post-successful deployment.
- Assign the “RIO Connect QBO Permission Set” to the Salesforce user that will be used to establish the RIO Connect connection. (This is in reference to #5 in the prerequisites section).
- To expose the additional fields/components for other Salesforce users too, repeat step #2 for the specific user/profile.
- Note that the additional fields are not included in any page layout by default.
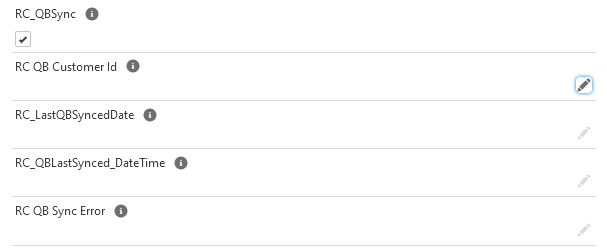
- You can however add the additional fields into the layout based on your liking. The following are some suggestions on how they can look like by creating a separate section called “RIO Connect Information":
- Contact page.
-
Student Fee page.

-
Payment page.

- Contact page.
All set
When all is set, reach out to the support team to request for further enabling RIO Connect for your account. We may provide you a secure form so that you can share the credentials information captured during the prerequisites stage.