[Functional] C11 - Student Scheduling
Table of Contents
RIO Challenge C11 - Student Scheduling
The Student Scheduler allows internal users to assign or schedule students to Course sessions (Classes, such as Tutorials and Lectures).
Learning outcomes
- Understand how to use the Student Scheduler to assign students to Course sessions.
Reading material
Estimated time to complete
15 minutes.
Steps to complete the challenge
In this challenge, there are 22 students who are enrolled to the same Course. In order to avoid having an overcrowded class, we will split and schedule them into 3 different Sessions (classes at different times).
- Click on the 'RIO Challenge V2' tab at the bottom left of the page. Click on 'Initiate Challenge' to generate the data required for this challenge.

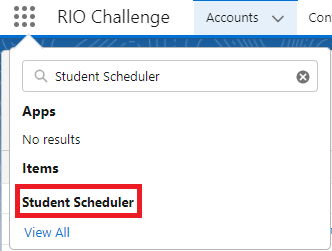
- Search for 'Student Scheduler' in the App Launcher.
- Then, click on the filter button at the top right of the page, and apply the following:
Educational Institution C11 - RIO University Department C11 - School of Business Campus C11 - Campus: Sydney Course C11 - Business Analytics 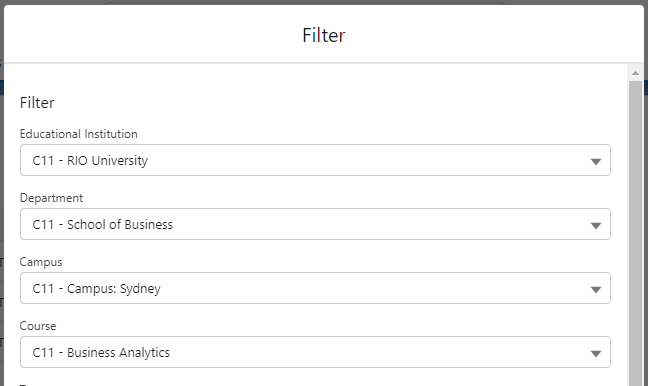
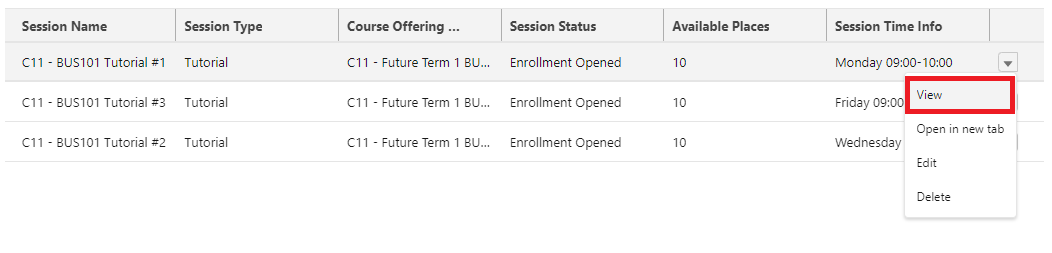
- Click the dropdown of the first Session and select 'View'.
- A list of students will appear on the left, that are eligible for assignment to the Session.
These students have enrolled for that corresponding Course using the Student Enrollment Wizard (for example see here).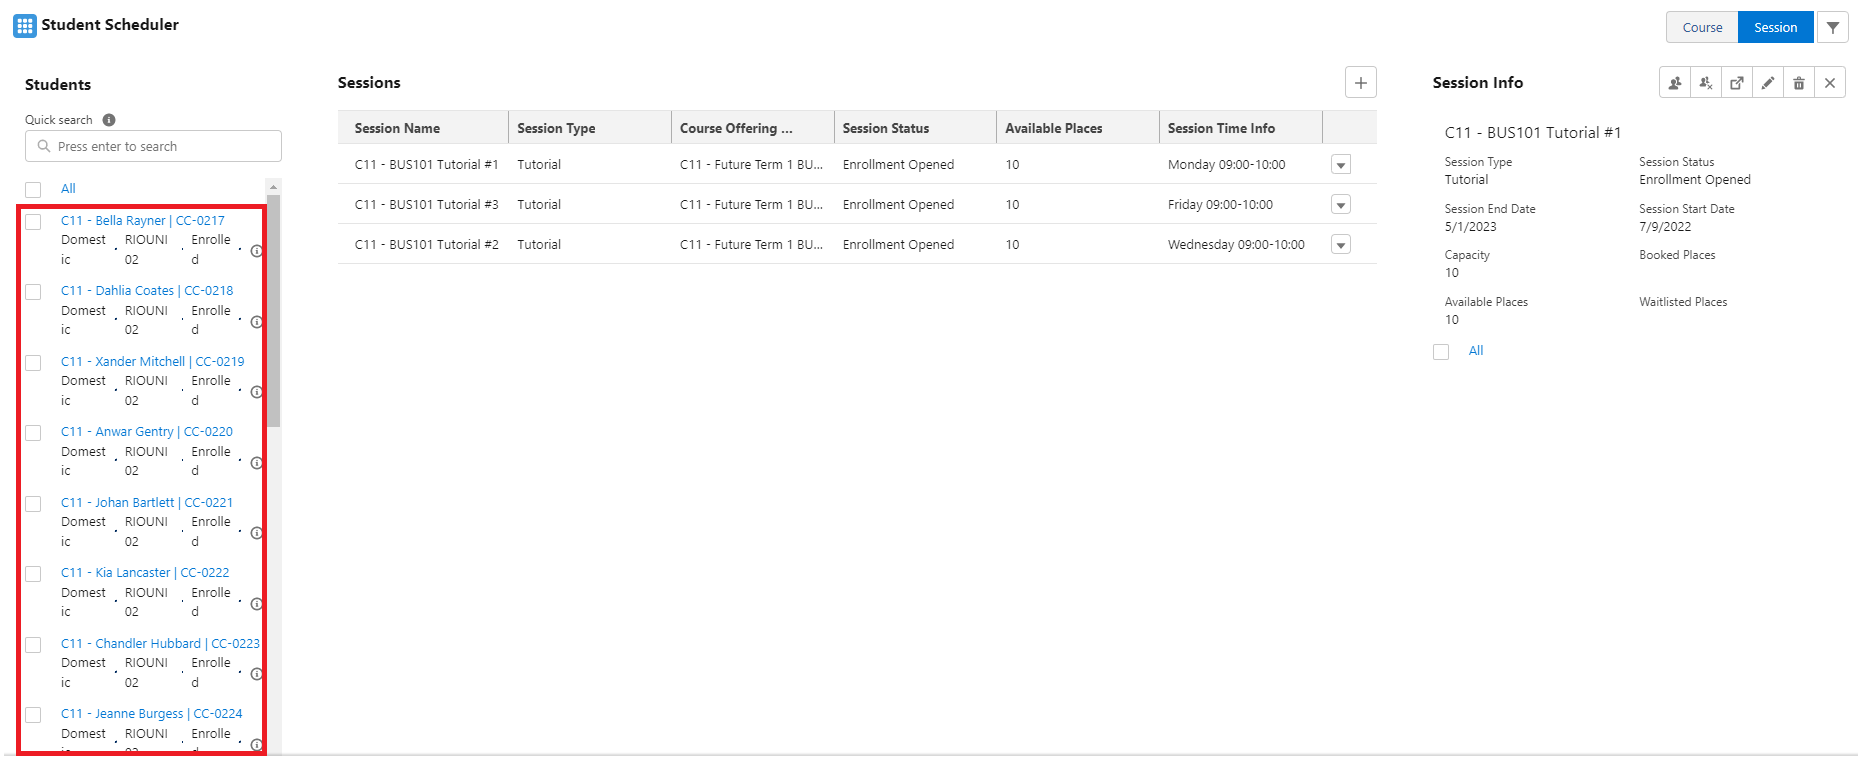
On the right, the information about the Session will appear.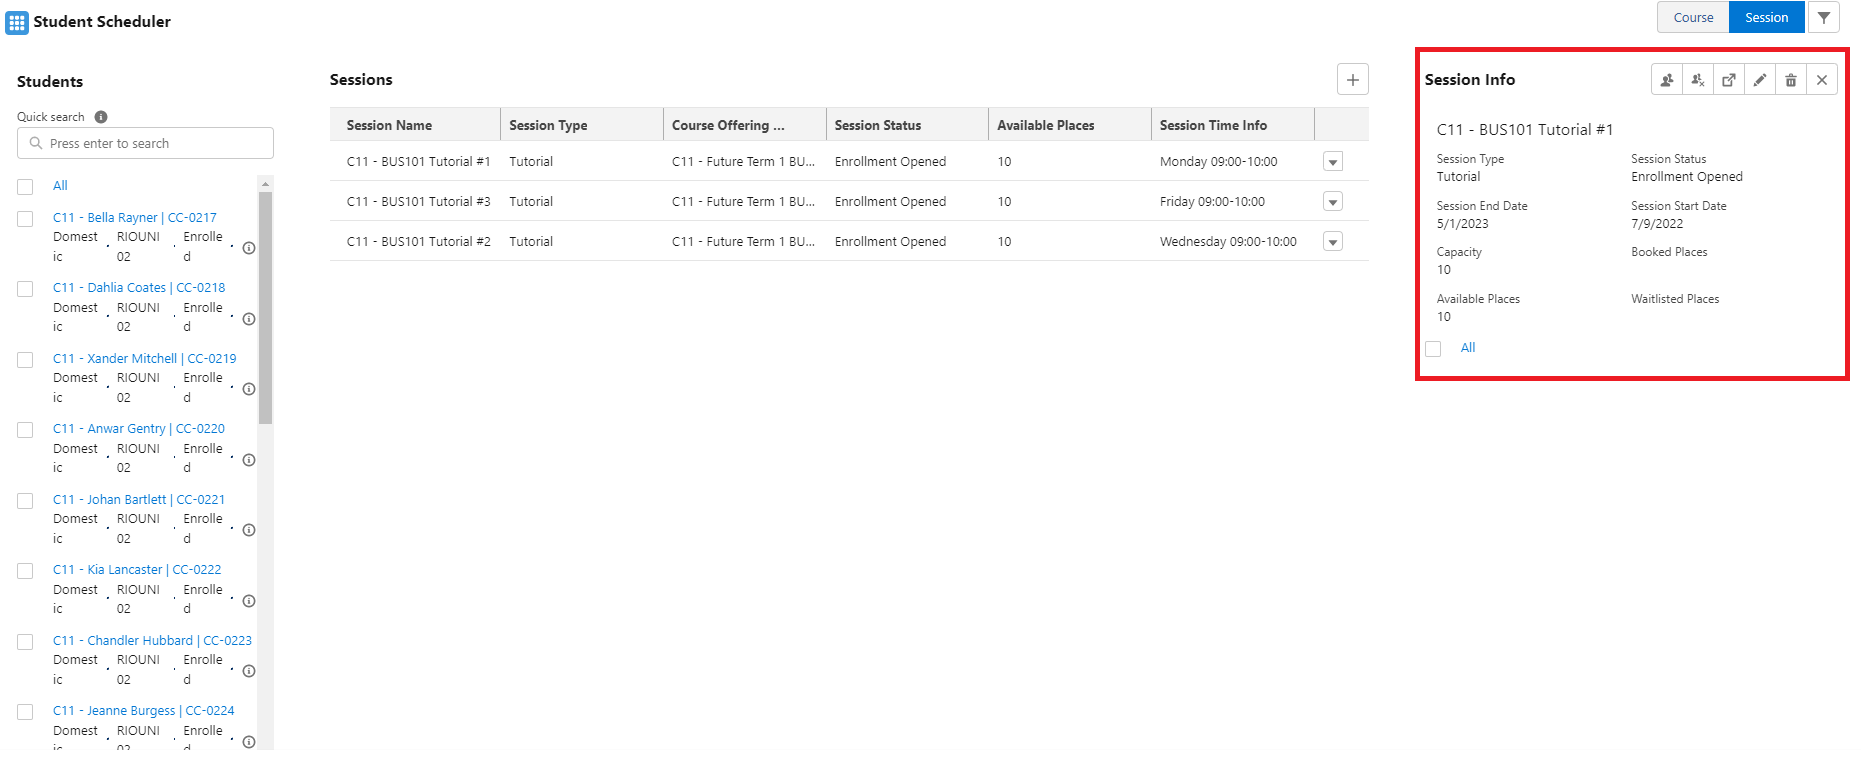
There are 23 students enrolled for the Course, and we cannot assign them all into the same Tutorial Sessions, as there are insufficient places available for any 1 Tutorial Session to accommodate them all.
Therefore, we will assign:
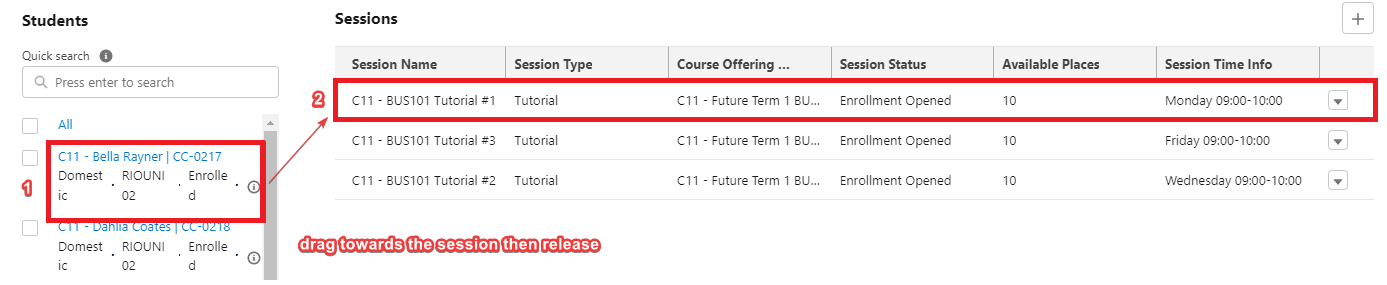
8 students to ‘C11 - BUS101 Tutorial #1’ session,
6 students to ‘C11 - BUS101 Tutorial #3’ session,
and the remainder students to ‘C11 - BUS101 Tutorial #2’ session.To do so, click and hold on the Student’s name, then drag it towards the Session and release.
When we release the student into the Session, a confirmation will pop up to ask if we wish to confirm the student’s assignment to the indicated Session.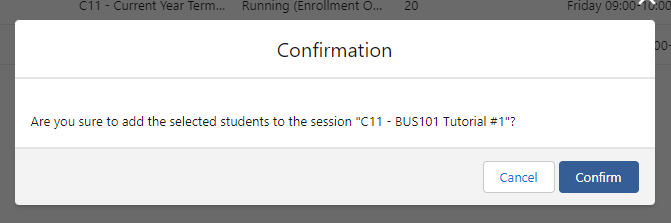
Once the assignment for the student is complete, we will be able to see the student’s name in the list for the session ‘C11 - BUS101 Tutorial #1’ on the right hand side.
Repeat the process to assign another 5 students to the Session ‘C11 - BUS101 Tutorial #1’, in order to make up 6 students for this Session.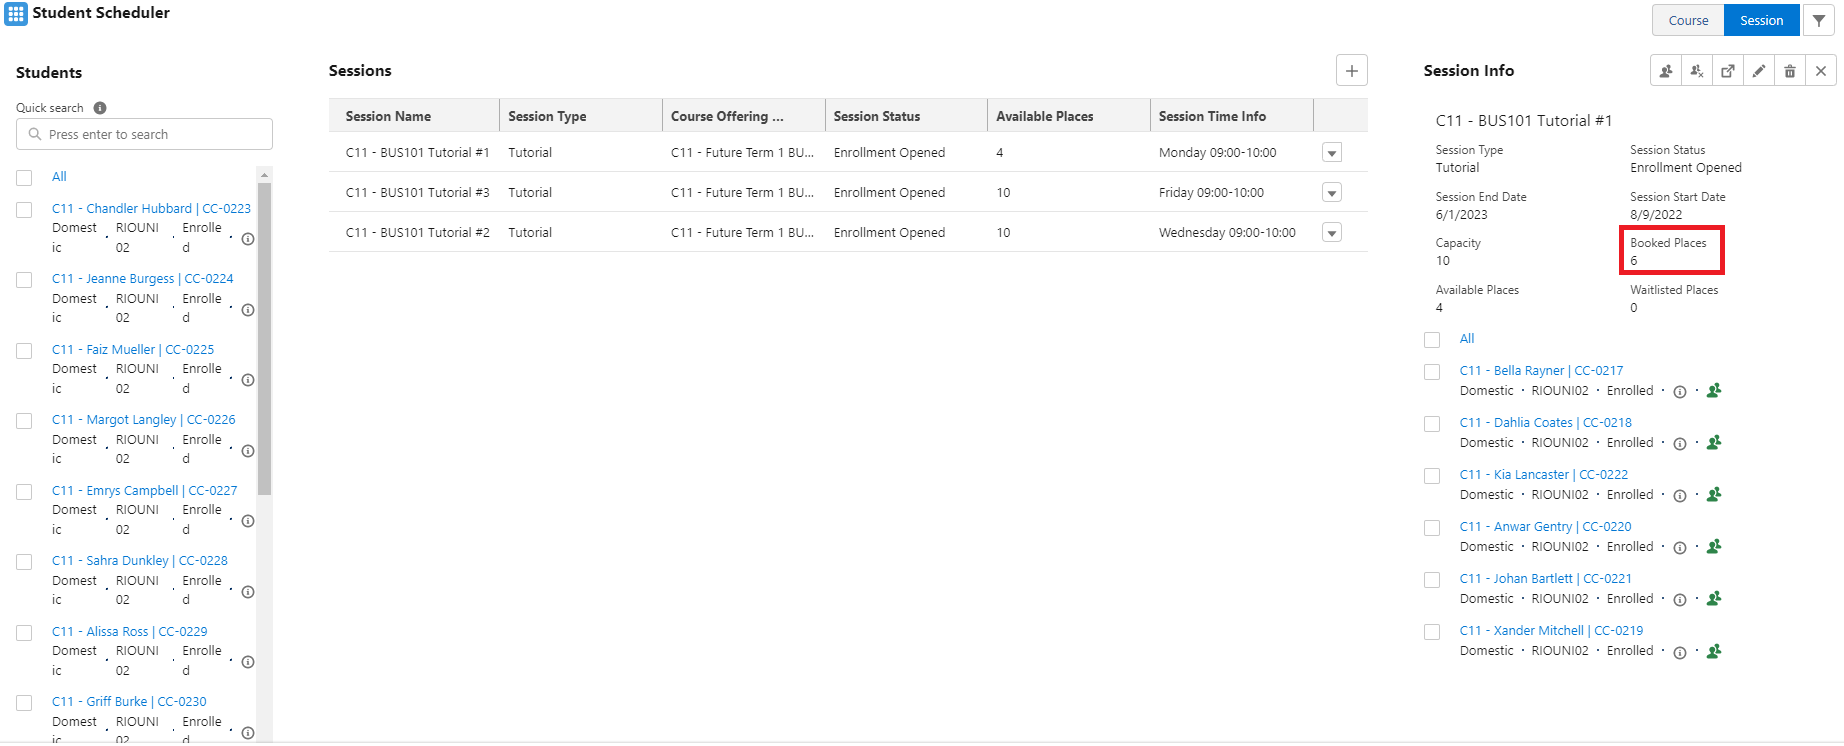
The Session currently is made up of Domestic Students. To add some diversity to the class, let's add 2 international students to the Session.
To ensure we add international students to the Session, enter 'International' into the search bar.
Note: The search bar can be customized to serve as a search filter, with variety of parameters. Check out this article here for more information.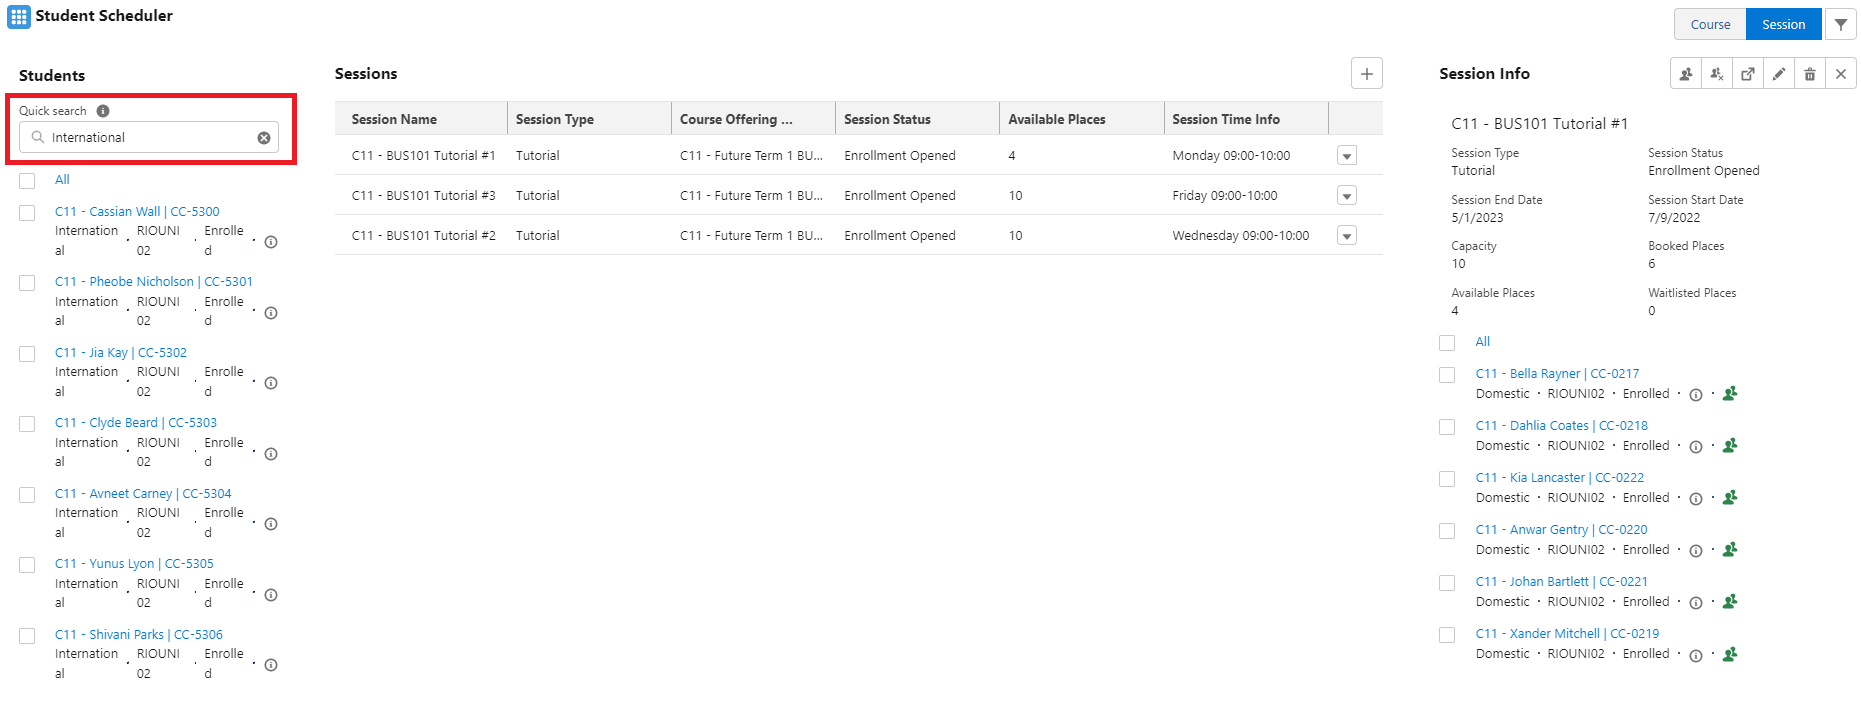
Now that the list is filtered to only display international students, drag two students into the Session.
-
Similarly, we want to assign 6 students for the Session 'C11 - BUS101 Tutorial #3', but rather than dragging the students one by one, we can do this faster, by selecting the students with the checkbox on the left hand side panel.
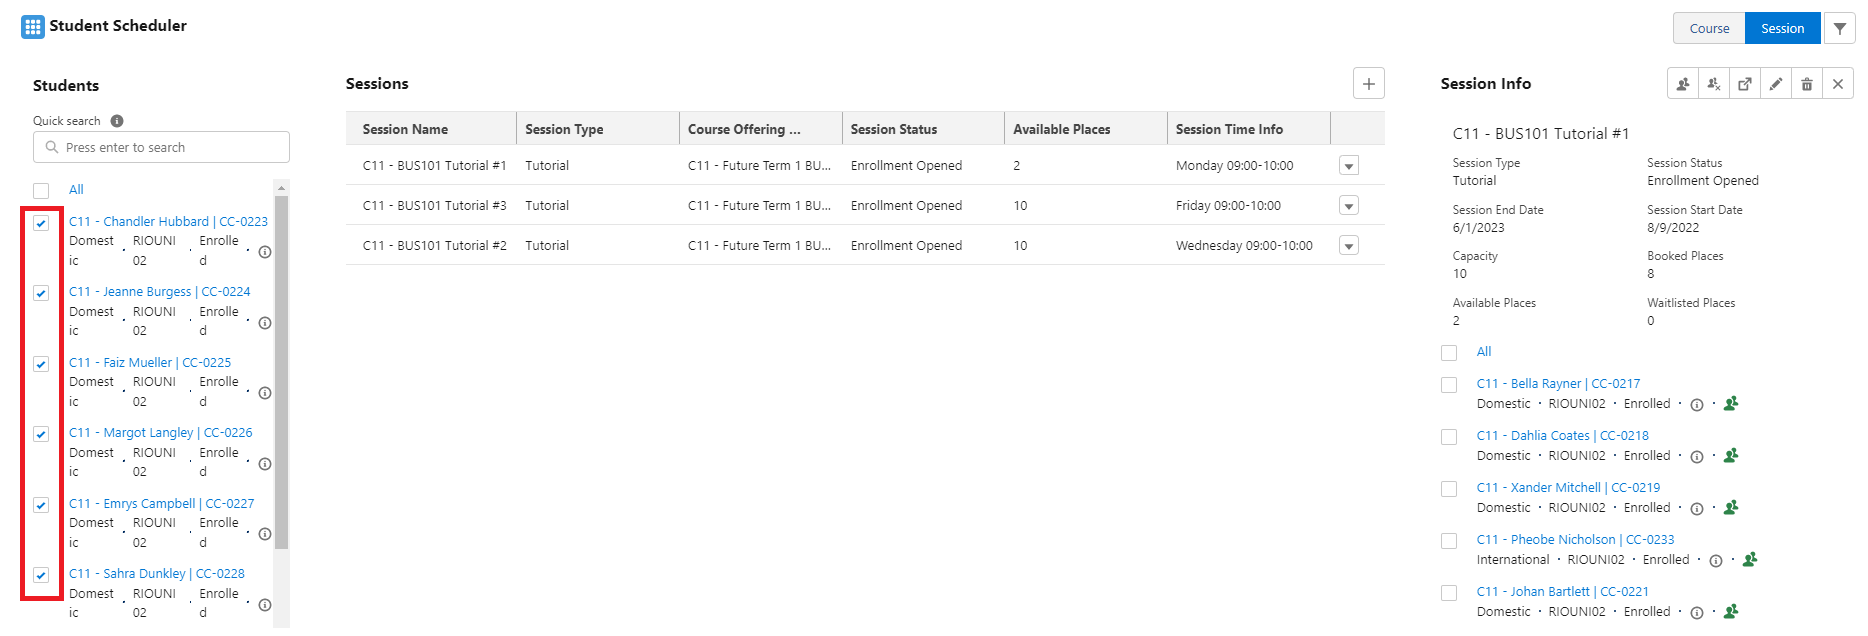
We can then drag any of the selected student cards across to the Session in the same manner as the previous Session.
We will see that all the students that had the selection checkbox checked will be moved together into the Session.
- The distribution of the students seem to be uneven. To solve this issue, lets assign one student from ‘C11 - BUS101 Tutorial #1’ to ‘C11 - BUS101 Tutorial #3’.
Drag one student from the list in ‘C11 - BUS101 Tutorial #1’ to ‘C11 - BUS101 Tutorial #3’.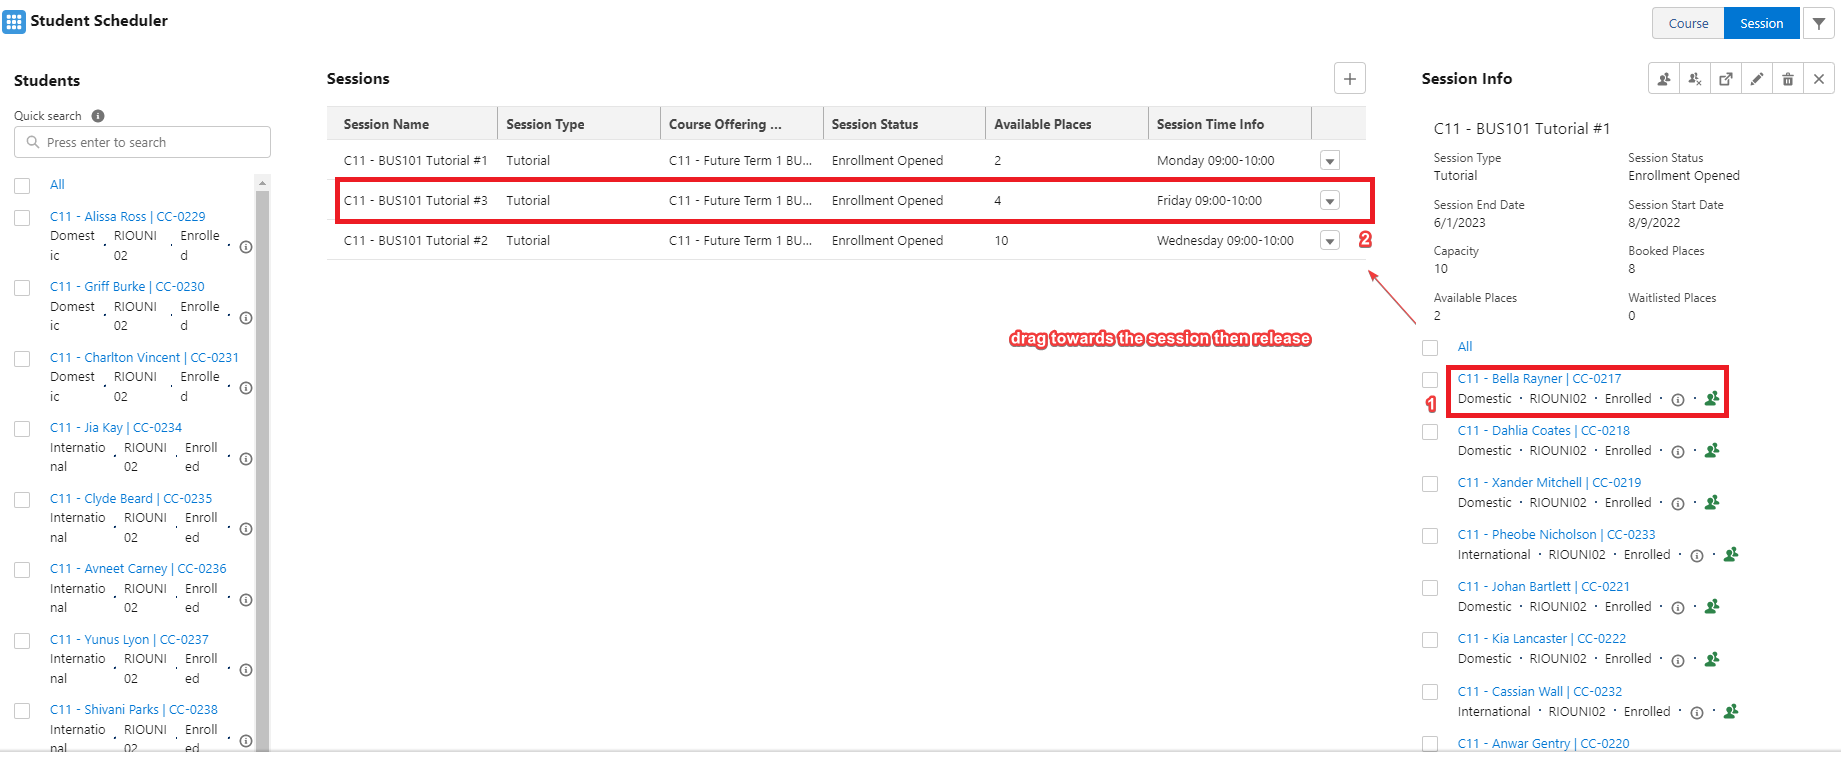
Now both Sessions are evenly distributed.
- For the last Session 'C11 - BUS101 Tutorial #2', we can select all the remainder of the students by checking ‘All’ on the left hand panel to select all the remaining students that have not been assigned in our current list.
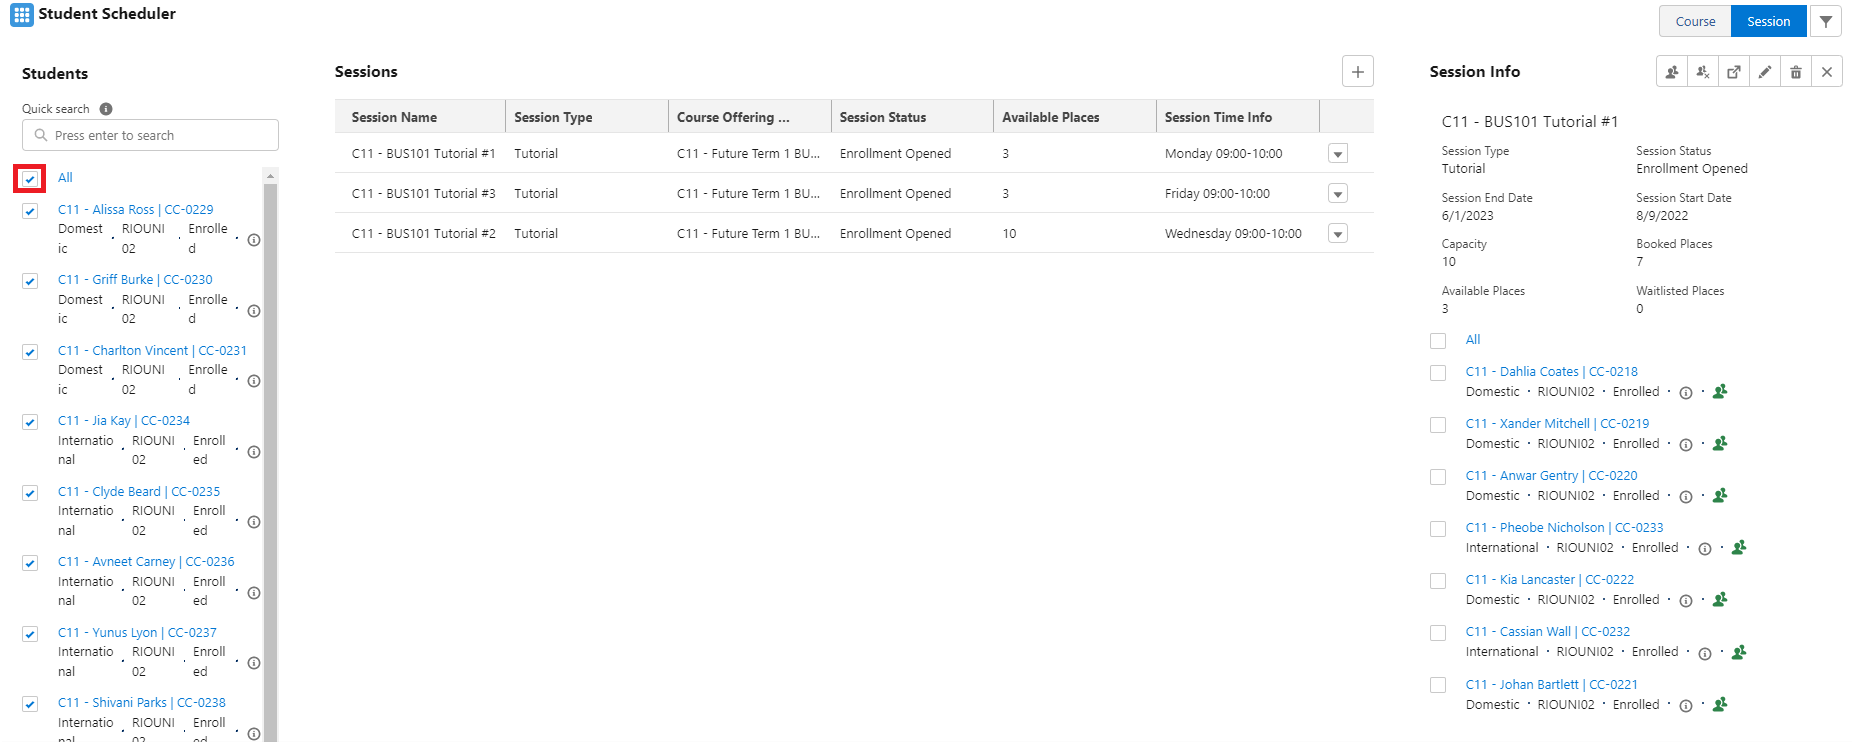
Assign these last remaining students to the final session ‘C11 - BUS101 Tutorial #2’. We should end up with all the eligible students for this Course assigned into all the Tutorial Sessions.
- Congratulations, you have completed the challenge! Click on the 'RIO Challenge V2' tab at the bottom left of the page, and click 'Complete Challenge'.
