US English (US)
ES Spanish

Contact Us

If you still have questions or prefer to get help directly from an agent, please submit a request.
We’ll get back to you as soon as possible.

Please fill out the contact form below and we will reply as soon as possible.

  • Log in
English (US)
US English (US)
ES Spanish
  • Home
  • Help & Support
  • RIO Recipe
  • Build & Implementation
  • RIO Ready
  • RIO Ready (V3)
  • RIO Ready: Scholarship

RIO Ready: Scholarship Functionality Setup

Contact Us

If you still have questions or prefer to get help directly from an agent, please submit a request.
We’ll get back to you as soon as possible.

Please fill out the contact form below and we will reply as soon as possible.

  • RIO Certification
    RIO Certification Program RIO Academy RIO Challenge RIO Recipe Training
  • Releases
    Release Notes
  • Help & Support
    Install RIO Education RIO Insights RIO Recipe Support
  • About Us
    Who is RIO Education? Start Your RIO Journey Housekeeping
  • Experience RIO in action
+ More

Table of Contents

Info
Delete

Info

If you have previously installed this, and have already made your own customizations, do not use the vanilla RIO Ready installer.

You will need to deploy your custom components and codes.

For this functionality's components, see here.


To quickly setup Scholarship, please follow the following steps:


Step 1: Activating the Flow

  1. Login to Salesforce and go to “Setup”.
  2. From Setup, click on Home.
  3. In the Quick Find box, enter Flows. Click on Flows.  
  4. Click on REDU Scholarship Application.
  5. Click on Activate.


Step 2: Including the Flow into Digital Experience Page

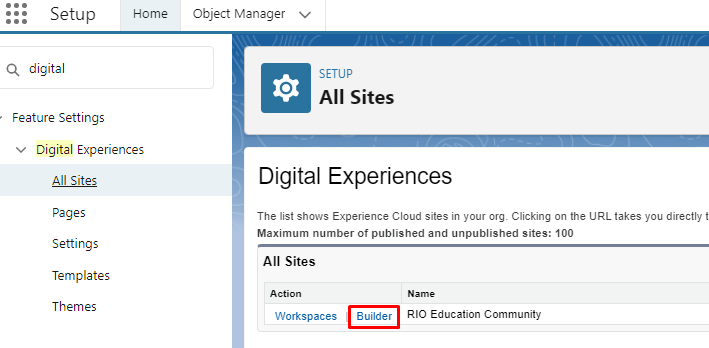
  1. From Setup, in the Quick Find box, enter Digital Experiences.

  2. Go to All Sites and then “RIO Education Community”, and click on "Builder".


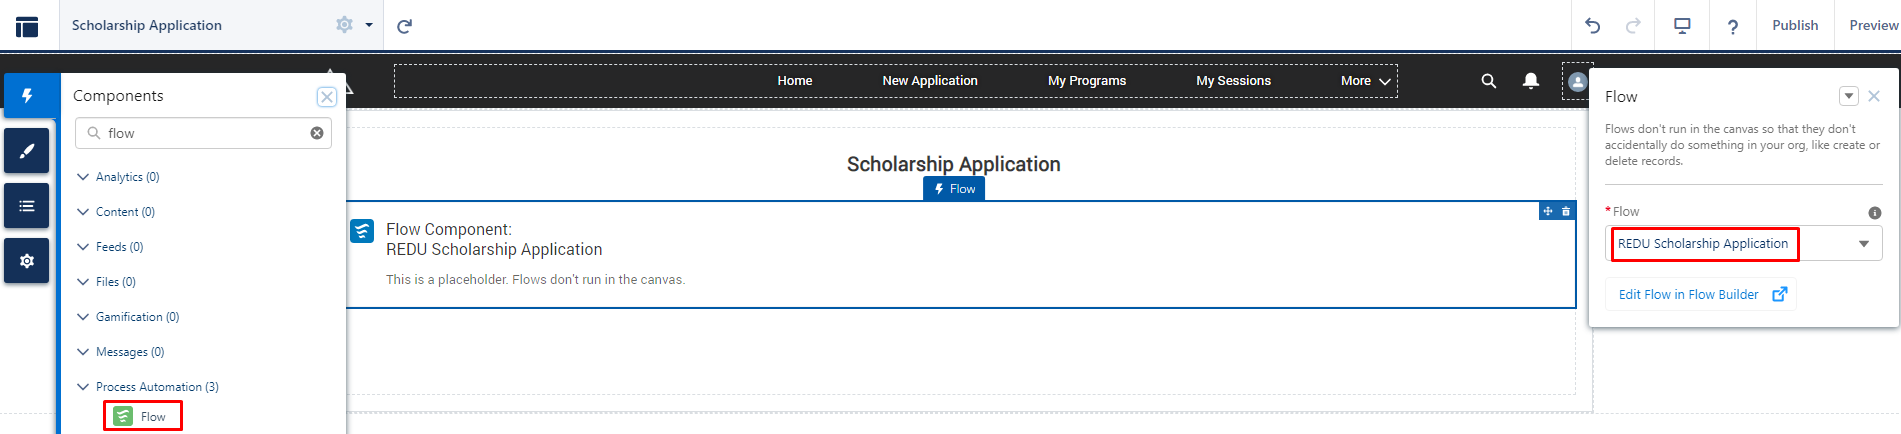
  3. From the top menu, in the Find a page…, enter Scholarship Application. Then, select the page. 


  4. Search for Flow in the Components section. Drag and drop the Flow component into the desired section of the page.

  5. In the Flow component properties, select the "REDU Scholarship Application" flow.


Step 3: Assigning Scholarship Permission Set to the Student 

If Login/Self Registration is installed:

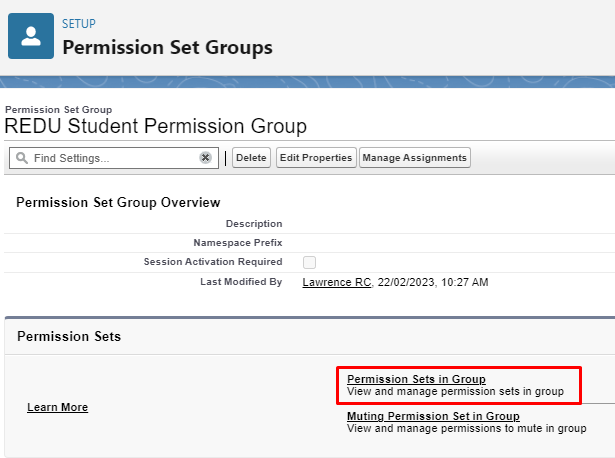
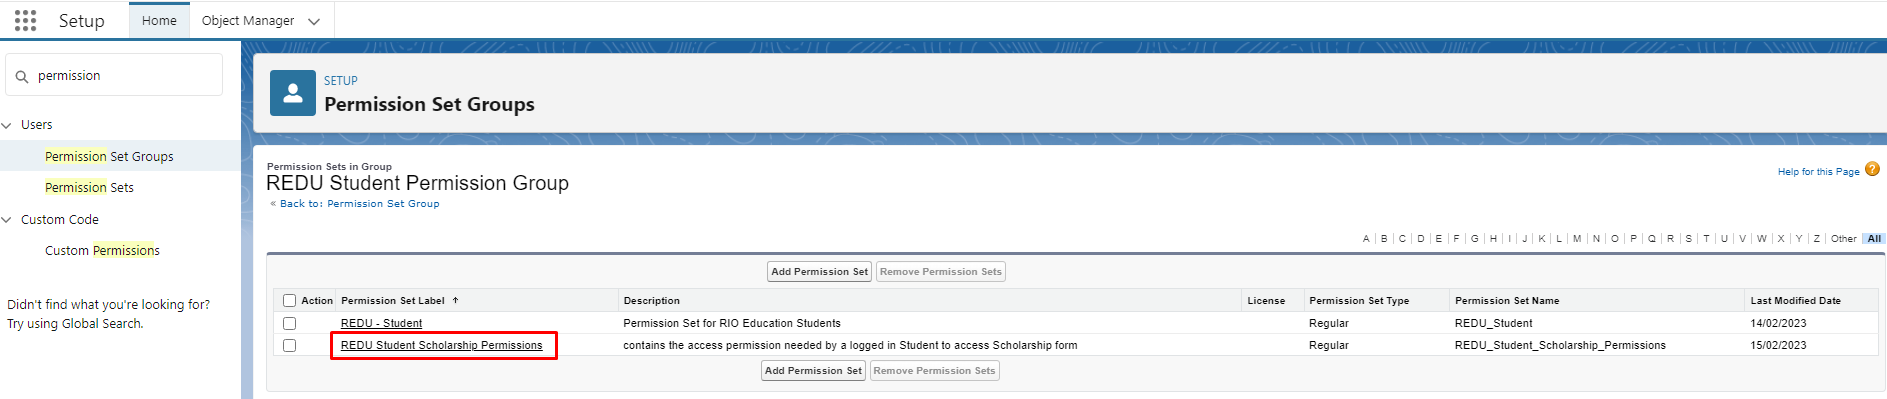
  1. Add the Permission Set "REDU Student Scholarship Permissions" into the Permission Set Group "REDU_Student_Permission_Group" by going into Setup, typing into the Quick Find box, enter "Permission Set Group".

  2. Click on "Permission Sets in Group".


  3. Click on "Add Permission Set".

  4. Select "REDU Student Scholarship Permissions" and then click Add.


If Login/Self Registration is not installed, then please assign the Permission Set "REDU Student Scholarship Permissions" to the new Student users either manually or with custom automation.


Note:

You will need this page that you have just created to be accessible by students.

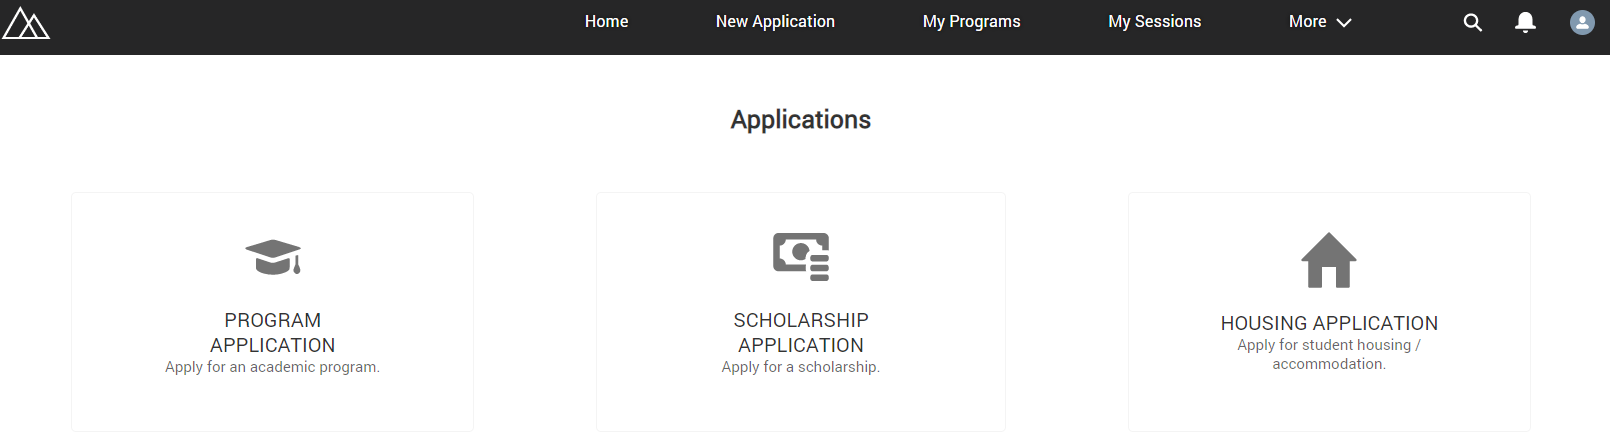
Scholarship is only one of the types of applications students can make in the Student Community.

You can create a main page for applications. From there, students can select which type of application they wish to make.

See setup here.


Was this article helpful?

Yes
No
Give feedback about this article

Related Articles

  • RIO Ready: Student Application Functionality Setup
  • RIO Ready: Login/Self-Registration Functionality Setup
  • RIO Ready: Accounts Receivable Display Setup
  • RIO Ready: Student Id Generation Functionality Setup
RIO Education

RIO Education, a WDCi Company. This information is proprietary, confidential and protected by copyright ©2024.

CONTACT

Get in touch

  • Privacy
  • Terms of service

Knowledge Base Software powered by Helpjuice

Definition by Author

0
0
Expand