RIO Ready: Accounts Receivable Display Setup
Table of Contents
See also: RIO Ready: Accounts Receivable Display Functionality
Accounts Receivable Display implementation in RIO Ready involves several custom fields in Contact to store the information, and a Flow to display said information in Community or other places where the Screen Flow can be used.
How to implement the Flow in the Community:
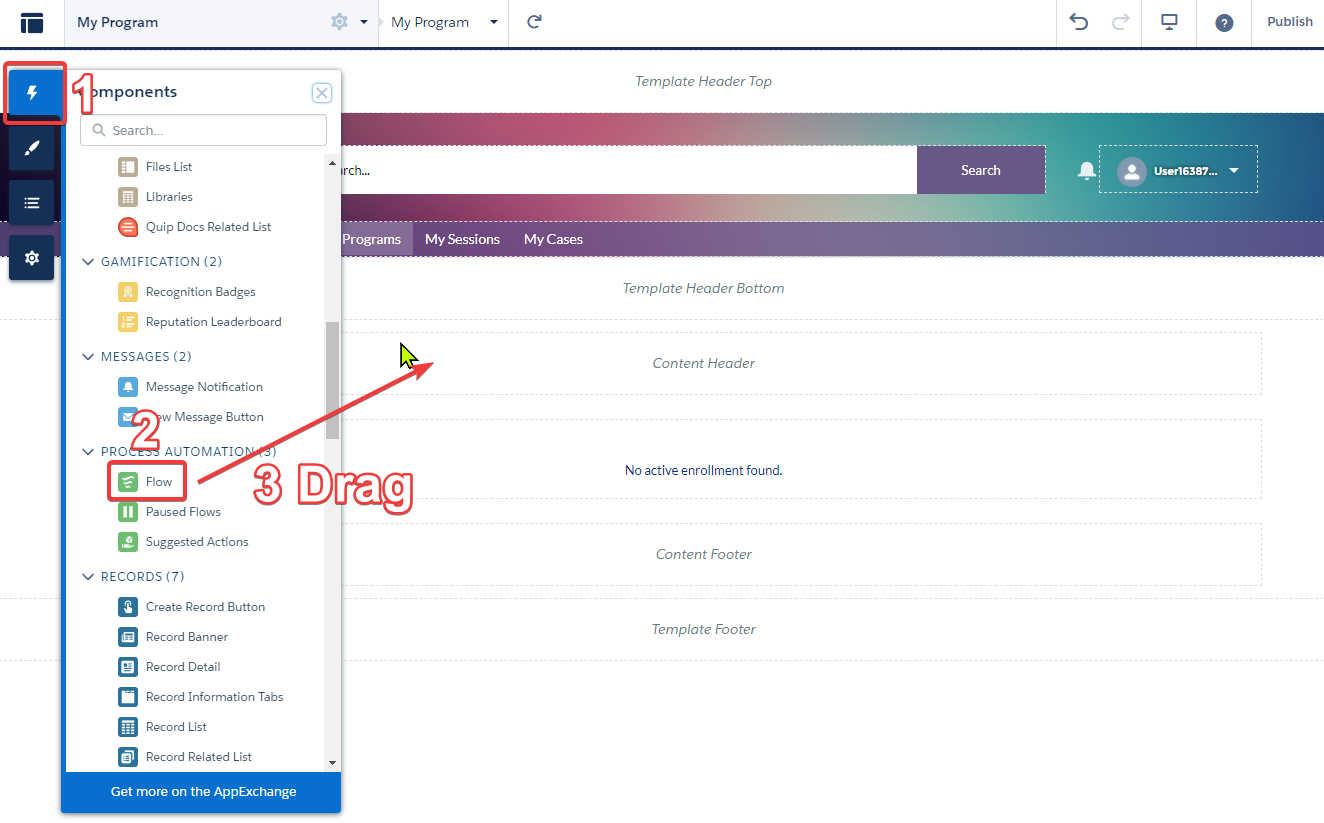
- Open the Community Builder.
- Open the page where we will place the display component.
- Find Flow from the list of Process Automation components list and drag it into the Community Page section where we want it to be shown.
- Next, click on the Flow component we just dragged into the Community Builder page. On the right panel, open the Flow list by clicking on the dropdown arrow, then find and select the Flow called 'Student Accounts Receivable Display'.
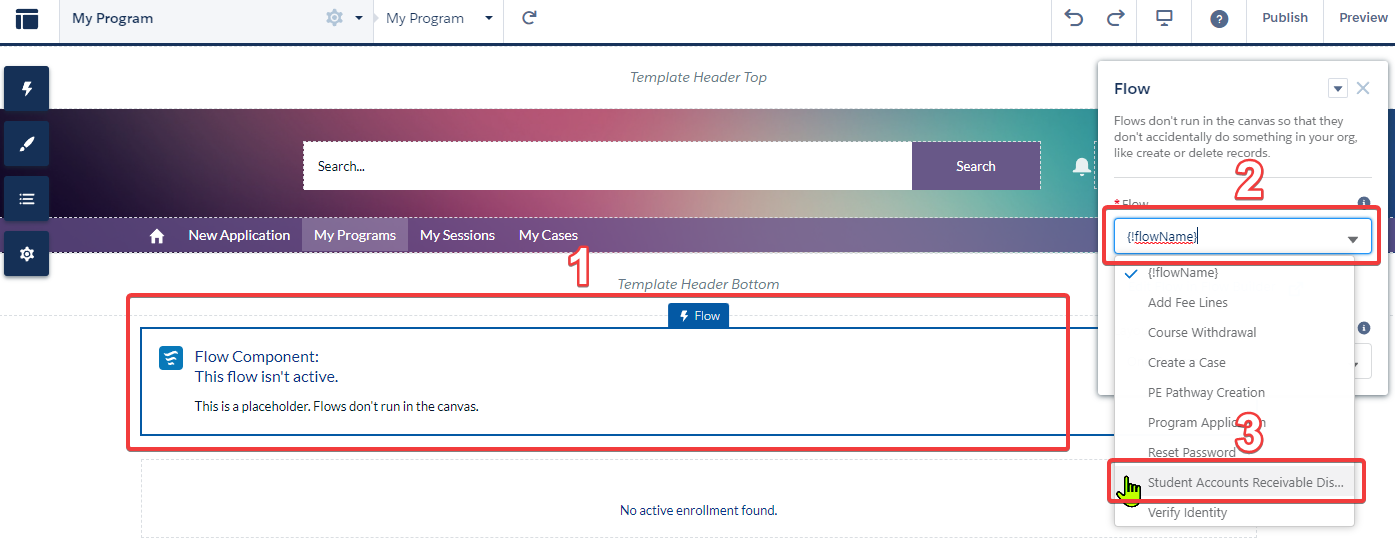
The rest of the setting shown in Flow can be ignored, and that's all that needs to be done to display the AR value in the Community side.
Assigning Accounts Receivable Permission Set to the Student
If Login/Self Registration module is installed:
- Add the Permission Set "REDU Student Accounts Receivable Permissions" into the Permission Set Group "REDU_Student_Permission_Group" by going into Setup, typing into the Quick Find box, enter "Permission Set Group".
- Click on "REDU Student Permission Group".
- Click on "Permission Sets in Group".
- Click on "Add Permission Set"
- Select "REDU Student Accounts Receivable Permissions" and then click Add.
If Login/Self Registration module is not installed, then please assign the Permission Set "REDU Student Accounts Receivable Permissions" to the new Student users either manually or with custom automation.
Note: This component relies on the login user information, so it can only be placed in pages where the user has to log into the system to access it (so naturally this would not work if we put this component into a public page where there's no login user running).
For the display to actually show something meaningful however, we will need to have the AR amount information that will likely come from an external system to be synced into Salesforce.
In this document, we will not be discussing how to integrate the value from external system into Salesforce, but note the following.
Fields that need to be updated with the external accounting software data:
- Custom field Contact.redu_Accounts_Receivable_Amount__c needs to be updated with AR amount coming from the external accounting software (either via integration or otherwise).
- Custom field Contact.redu_Accounts_Receivable_Last_Updated__c needs to be updated with the Date and Time stamp when the process that updates Contact.redu_Accounts_Receivable_Amount__c is running to give us an indication of when the last update was performed.
The formula field Contact.redu_Displayed_AR_Amount__c will not be updated with data from external accounting software, but instead will be modified as necessary if there is any custom logic that is needed on the AR amount value before it is displayed to the user/student.
By default this formula field will simply copy the value shown in Contact.redu_Displayed_AR_Amount__c , but if there is a custom logic required by the customer, then this formula field is the place to go.