RIO Ready: Community Transcript Setup
Table of Contents
To quickly setup the Community Transcript functionality, please follow the following steps:
Prerequisite:
- S-Docs installed and configured, for more information please refer to here.
- S-Docs feature to run as another user is set, for more information refer to here.
- RIO Ready - Community Transcript is installed. See here.
Note: Ensure that the ConnectedAppUserName in S-Docs Custom Setting is populated with the user name of the User that we want to run S-Docs Document Generation process as for the Community User, as our automation depends on this setting.
As of the time of this writing (09/03/2022), there is an issue with the S-Docs "Run as other user" feature that requires a newer Beta package from S-Docs than the publicly available package version. The Beta package that was used to fix this issue was v4.490, so please ensure that you are using a newer package than this, so that your instance is not afflicted by the issue.
Step 1: Activating the Flow
- Login to Salesforce and go to “Setup”.
- From Setup, click on Home.
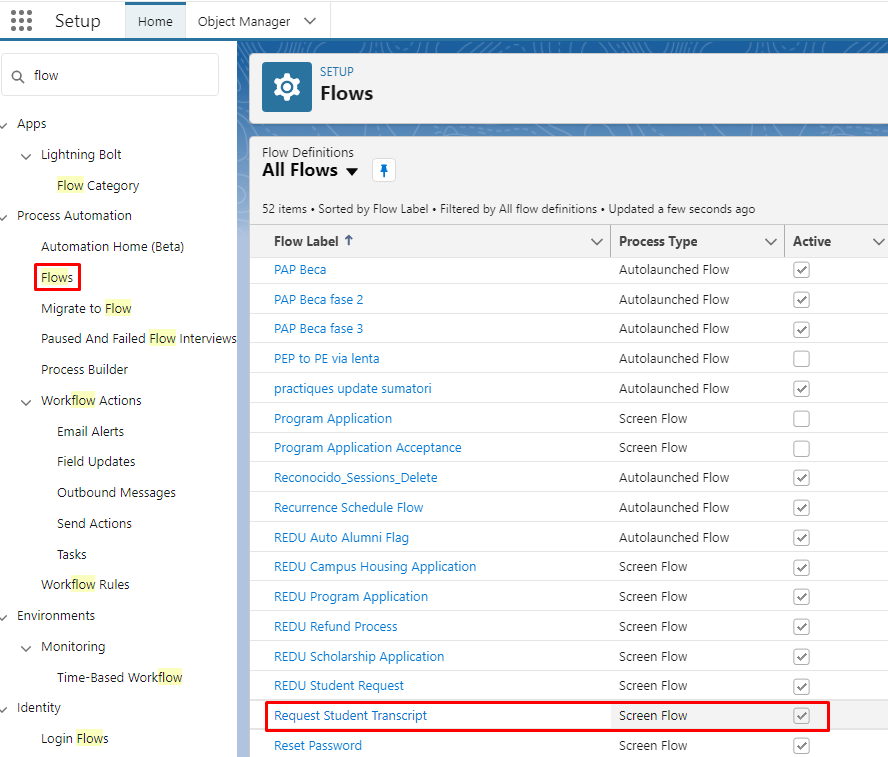
- In the Quick Find box, enter Flows. Click on Flows.
- Click on "Request Student Transcript".
- Click on Activate.
Step 2: Including the Flow into Digital Experience Page
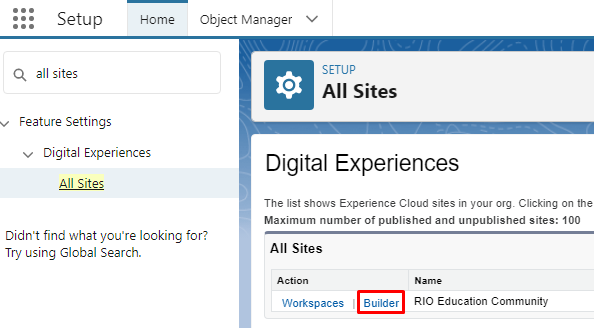
- From Setup, in the Quick Find box, enter Digital Experiences.
- Go to All Sites and then “RIO Education Community”, and click on "Builder".
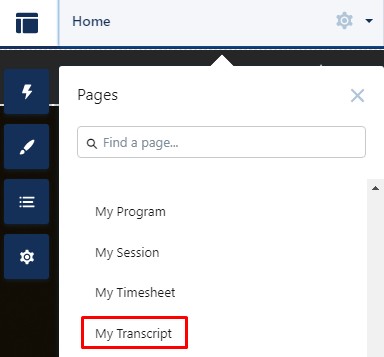
- From the top menu, search for 'My Transcript'. Then, select the page.
- In the Components, select 'Flow'. Drag and drop the Flow component into the desired section of the page.
- In the Flow component properties, select the "Request Student Transcript" flow.

- Publish the changes.
Step 3: Setting the Custom Metadata for the File Sharing Configuration
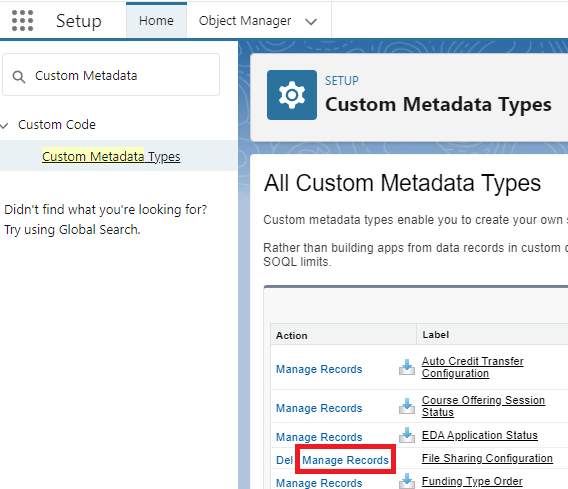
- From Setup, in the Quick Find box, enter Custom Metadata.
- Go to All Custom Metadata Types and then search for “File Sharing Configuration”, and click on "Manage Records".
- From the top menu, select the "New" button.

- In the New Record Page, enter the following information:
Field Value Label
Name of Configuration (E.g. Official Transcript PDF).
File Sharing Configuration Name
API Name of Configuration (E.g. Official_Transcript_PDF).
Active
Defines if Configuration is Active (E.g. Ticked/Checked).
ContentVersion File Category
Category of File (E.g. Official Transcript).
Template Name
SDoc Template Name (E.g. Official Transcript).
Visibility
Defines if File is visible in Community (E.g. Not visible in Community).
- click on "Save".
Step 4: Enabling the Community File Access Trigger
We're almost done, next we need to enable the trigger that is responsible for ensuring that the Transcript file generated by S-Docs is accessible to the student.
To do so:
- Open the Developer Console.
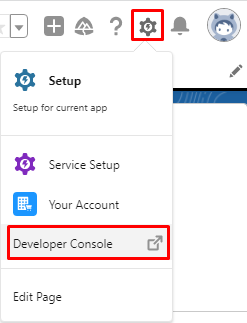
- Go to Debug (on the top menu) -> click on "Open execute Anonymous Window".

- Paste the following and execute it:
redu_SDoc_Visibility_TDTM.installTDTMSetting();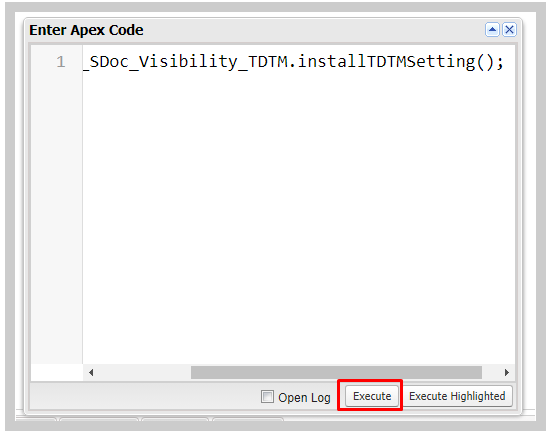
Step 5: Setting the Permission Set for the Student Users
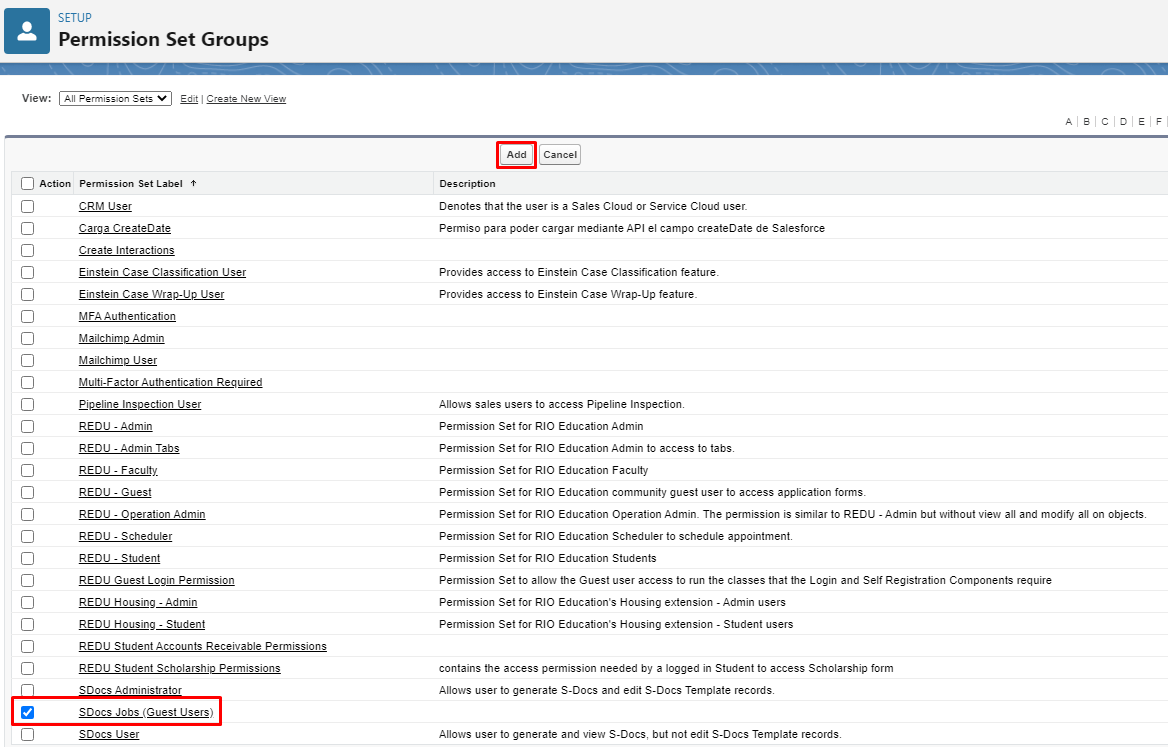
We need to ensure that newly created Student for the Community are given the permission set "SDocs Jobs (Guest Users)".
If the Login/Self Registration module is installed, then:
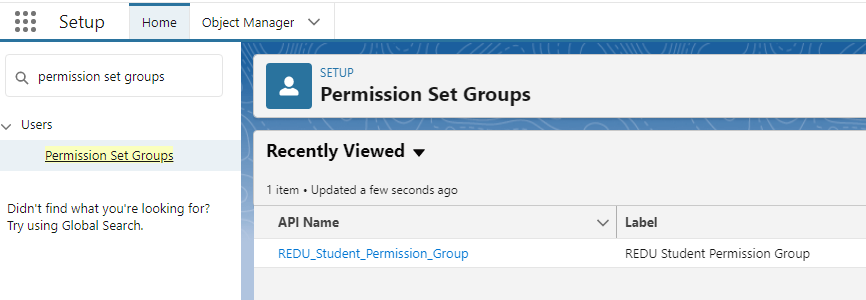
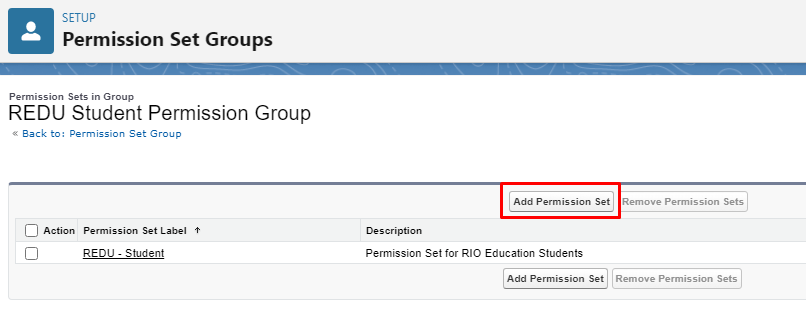
- Add the Permission Set "SDocs Jobs (Guest Users)" into the Permission Set Group "REDU_Student_Permission_Group" by going into Setup, typing into the Quick Find box, enter "Permission Set Group".
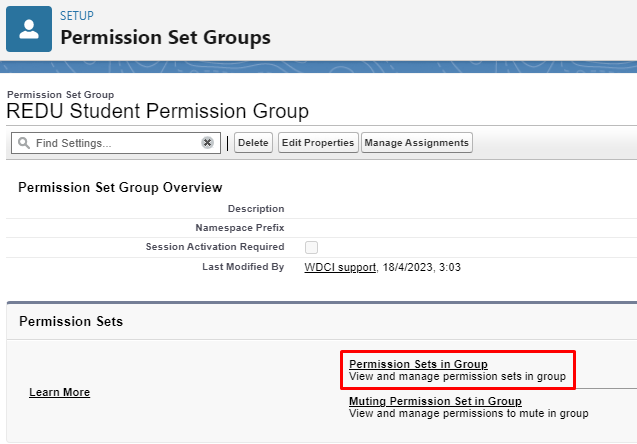
- Click on "Permission Sets in Group".
- Click on "Add Permission Set".
- Select "SDocs Jobs (Guest Users)" and then click Add.
If the Login/Self Registration module is not installed, then please assign the Permission Set "SDocs Jobs (Guest Users)" to the new Student users either manually or with custom automation.
Step 6: Transcript-Official Template
- The Transcript-Official template can only be made available only when S-Docs is installed.
- If S-Docs is already in place, search for S-Docs app from the app switcher.
- Click on the S-Docs Templates and look for Transcript-Official. This is a ready-template for you to use.
- If you are not able to find the Transcript-Official template record, then create a new Template and follow the steps below:
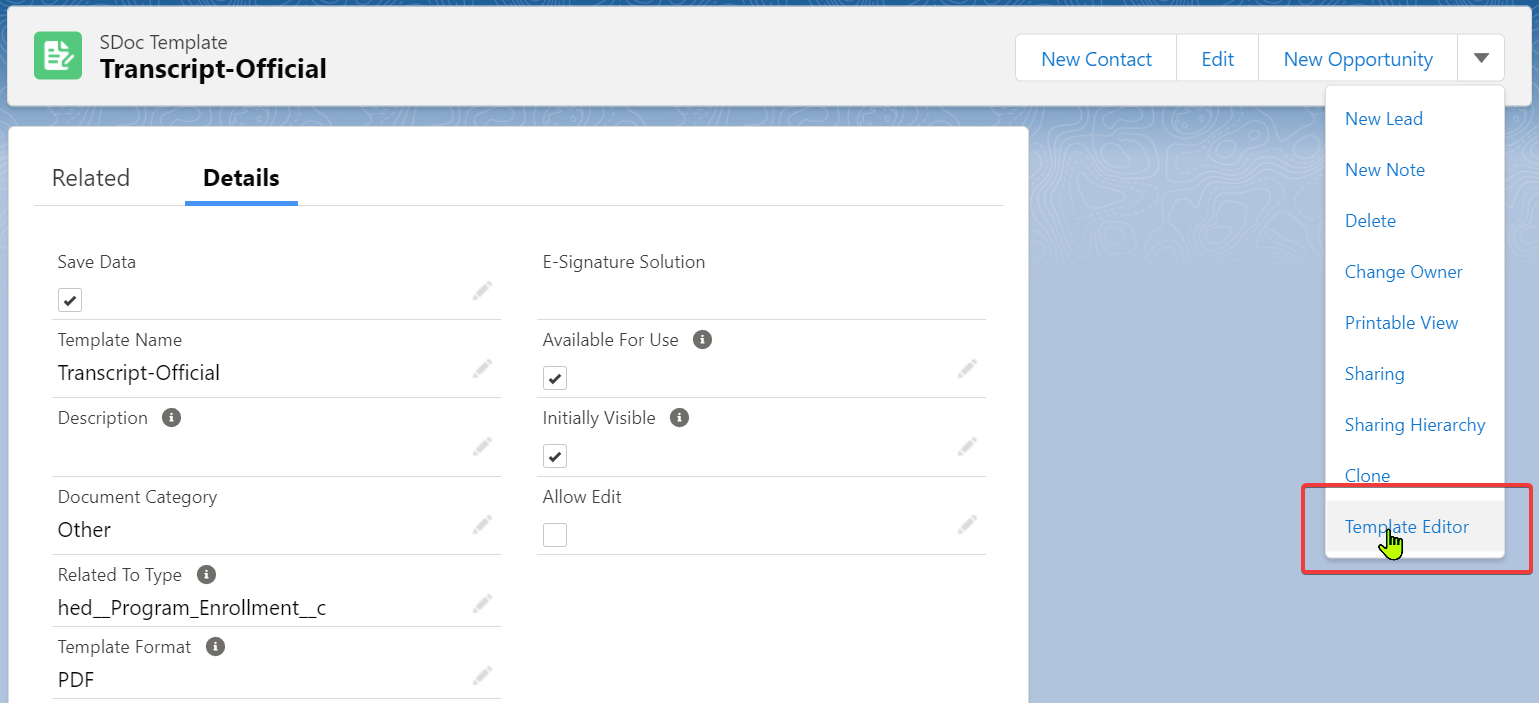
- Make sure that the Template Name is set to “Transcript-Official”.
- Set the "Related To Type" to "hed__Program_Enrollment__c".
- Set the "Template Format" to "PDF".
- Make sure that "Available For Use" is checked.
- Open the "Template Editor" from the menu on the top right.
- Copy the text contained in this file here: Transcript_Official_13_06_2022.txt.
- Paste that text into the Template Body section:
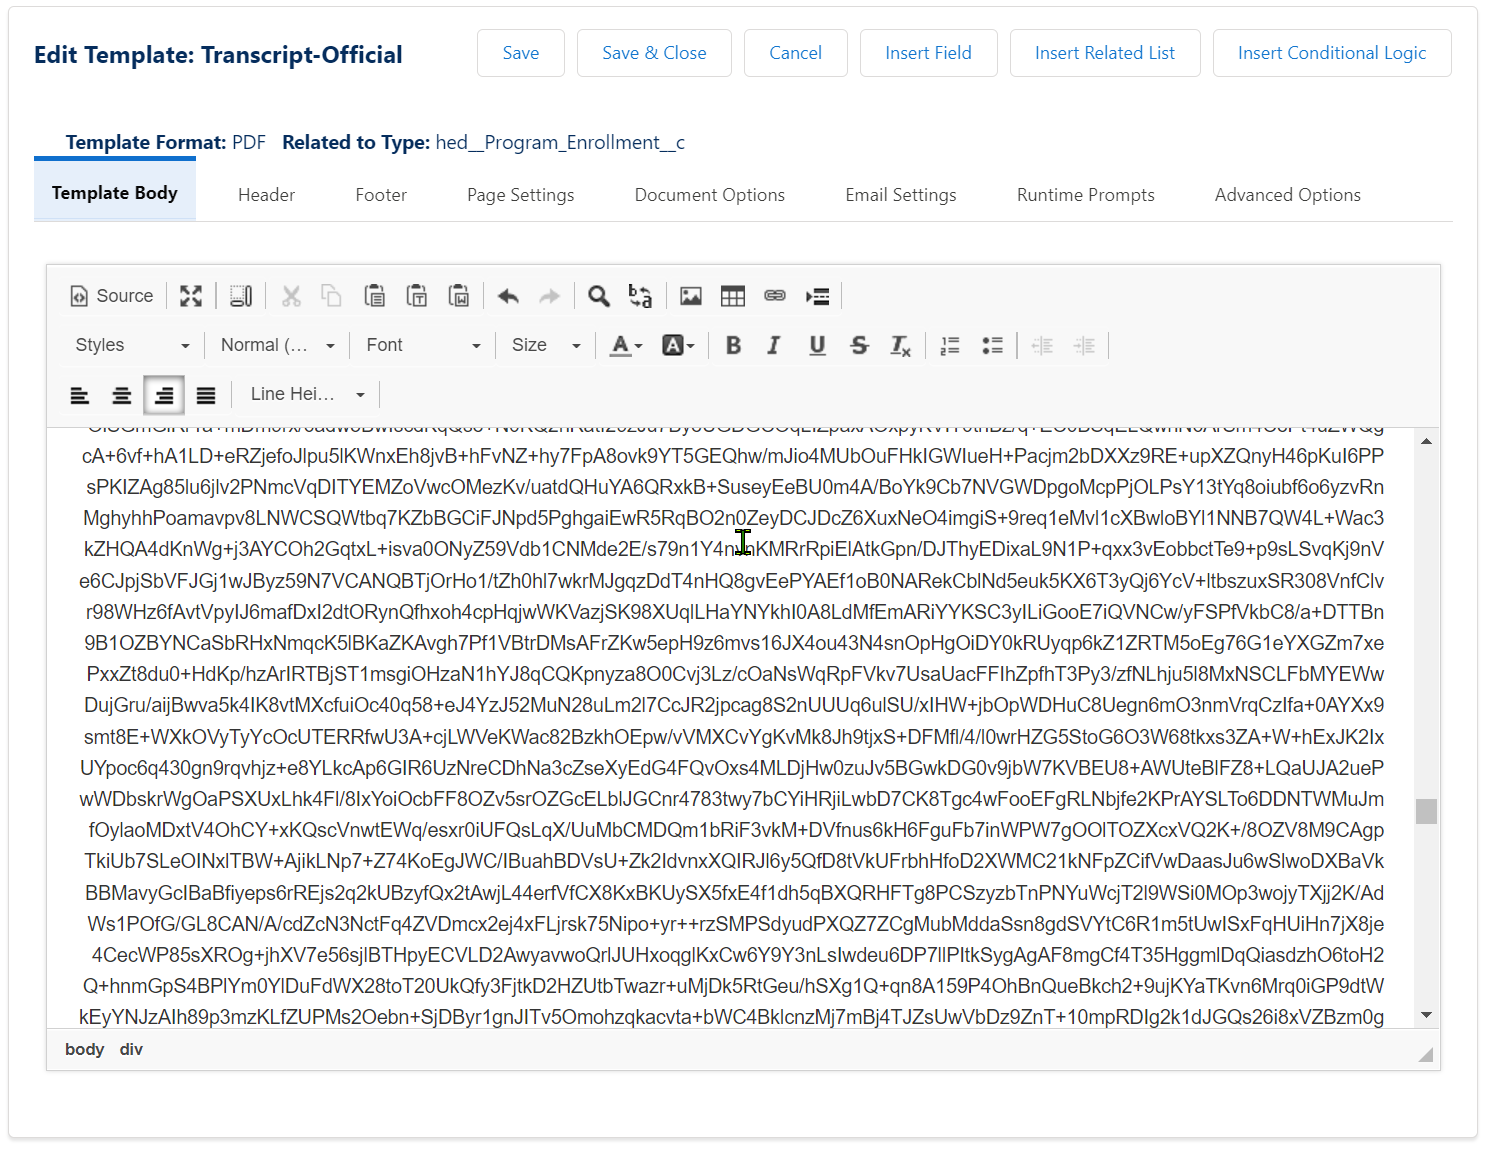
- Save & Close to complete the process.
- Ensure that the Template has it's Additional Relationship set to Contact.
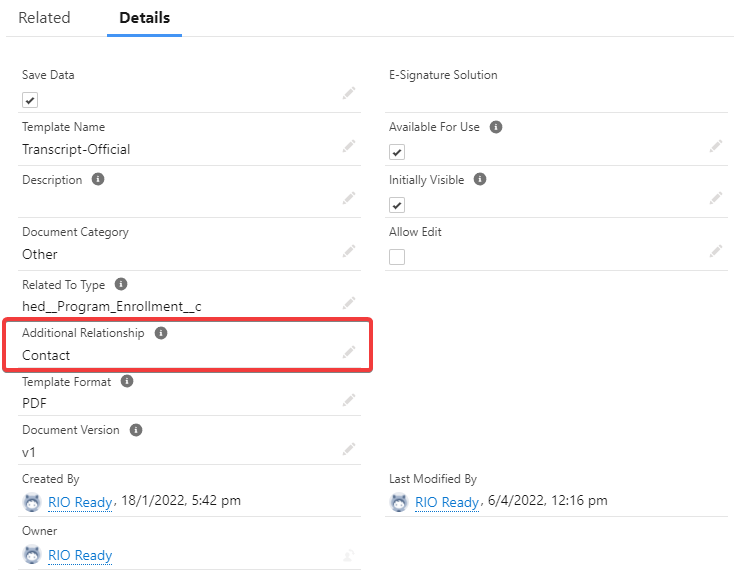
If the field is not visible, edit the Layout: 'SDoc Template Layout' and add the 'Additional Relationship' field into the layout. Save, and then finally refresh the Template detail page.